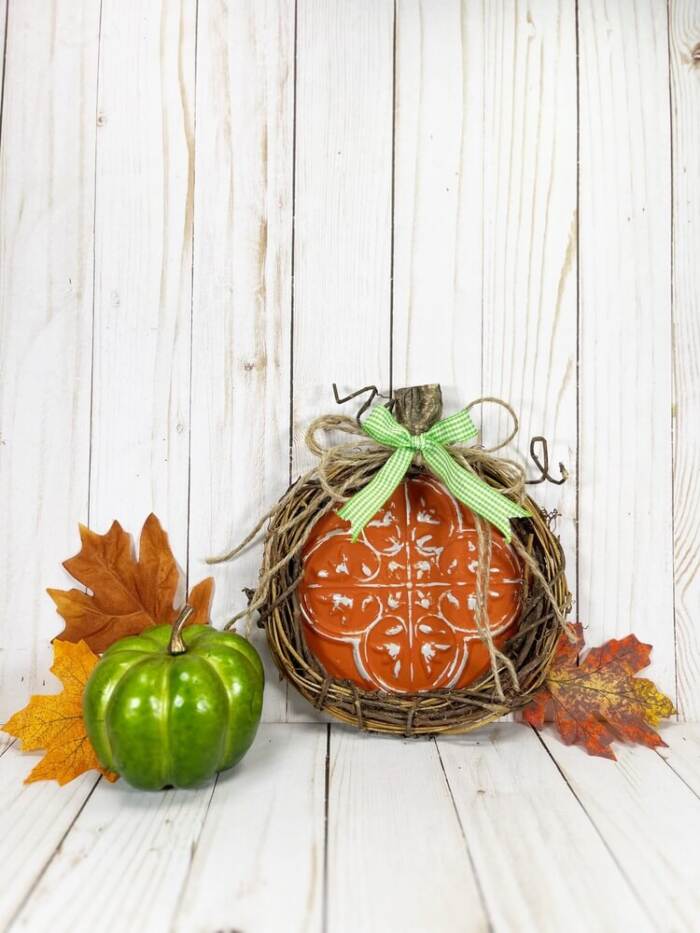
If you’re looking for an easy and affordable fall project, this Dollar Tree pumpkin craft is a great way to add seasonal charm to your home without spending a lot of money.
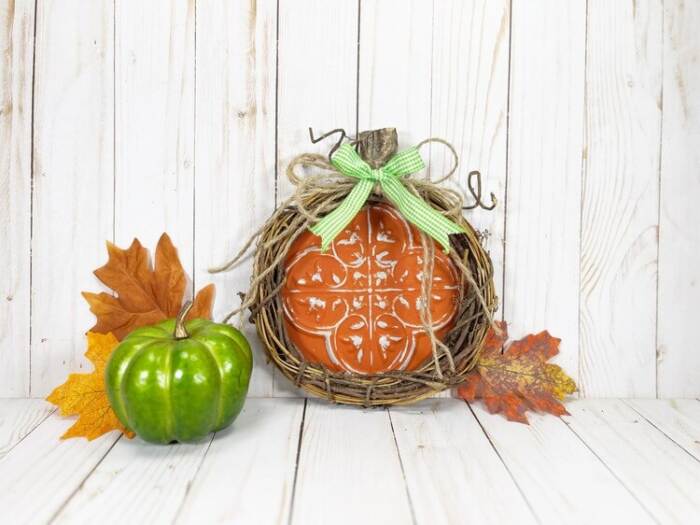
Using simple supplies from Dollar Tree, you can create a festive pumpkin decoration that’s perfect for mantels, entry tables, shelves, or fall centerpieces.
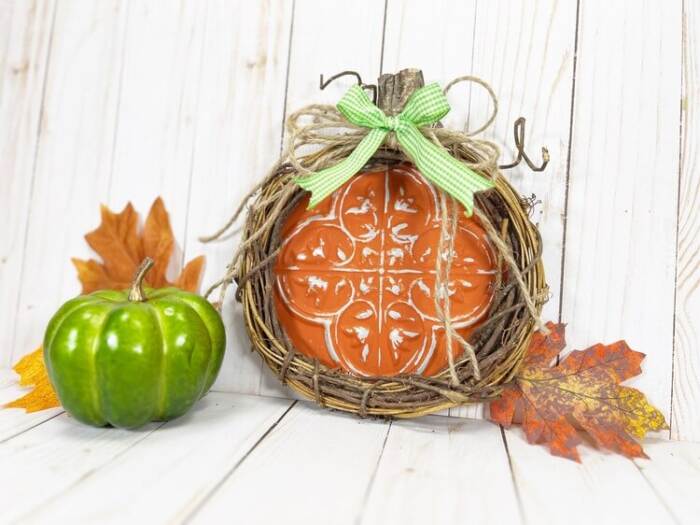
One of the best things about this Dollar Tree pumpkin craft is how easy it is to customize. Whether you prefer rustic farmhouse decor, traditional fall colors, or something a little more modern, you can easily adjust the materials and finishes to match your style. It is a beginner-friendly project that comes together quickly but looks like something you would find in a boutique or home decor store.
Yes, this is an easy craft that is perfect for beginners. It uses simple techniques and inexpensive supplies, making it a great project for crafters of all skill levels.
This Dollar Tree pumpkin craft can be completed for just a few dollars, depending on the supplies you choose. It is an affordable way to decorate your home for fall without spending a lot.
Absolutely. You can change the paint colors, ribbons, embellishments, and decorative accents to fit farmhouse, rustic, modern, or traditional fall decor styles.
This craft works well on mantels, coffee tables, shelves, entryway tables, tiered trays, or as part of a fall centerpiece. It is a versatile decoration that fits almost anywhere in your home.
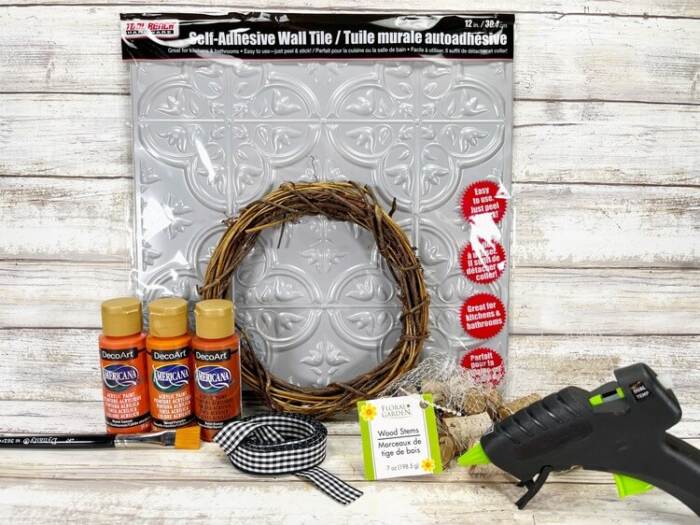
Supplies
- Self-Adhesive Faux Tin Wall Tile – Dollar Store
- Gingham Ribbon – Dollar Store
- Wood Stems – Dollar Store
- Glue Gun and Glue Sticks – Dollar Store
- Grapevine Wreath, 8” – Craft Store
- Acrylic Craft Paint – Dark Orange
- Paintbrush
- Scissors
- Permanent Marker
- Paper Towel or Baby Wipe
How to Make This Dollar Store Pumpkin Craft
Step One
Gather your materials and remove all tags and packaging. Place the faux tin tile on your work surface and use a permanent marker to trace the outer edge of the grapevine wreath onto the tile.

Step Two
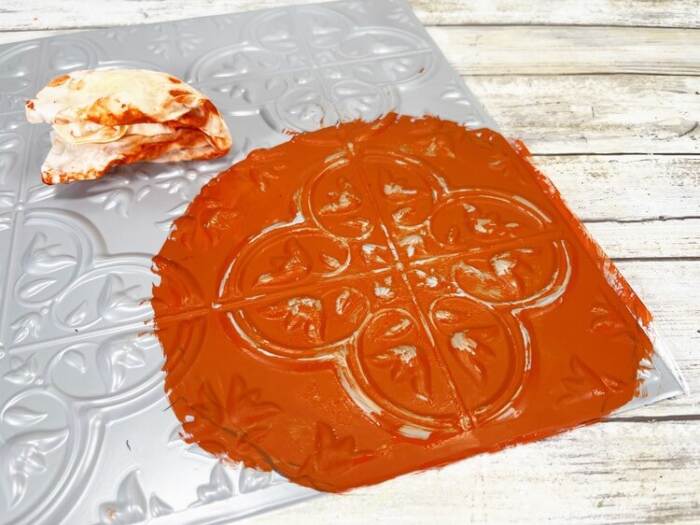
Paint the traced circle on the faux tin tile with dark orange acrylic craft paint.
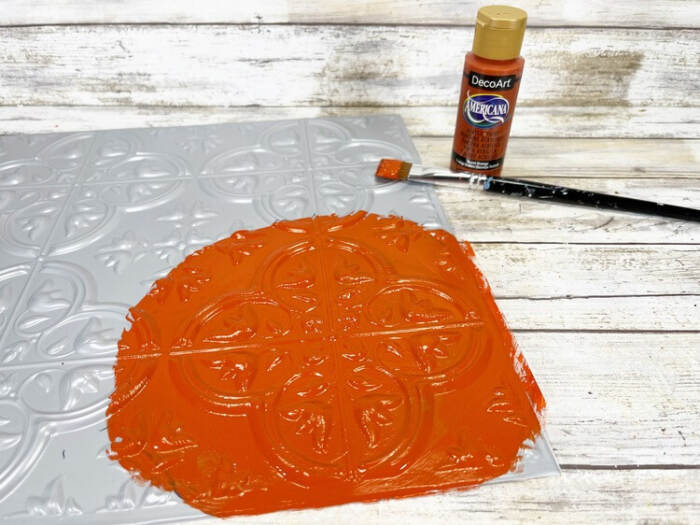
Step Three
While the paint is still wet, lightly wipe the raised areas with a damp paper towel or baby wipe so some of the tile’s original grey shows through.
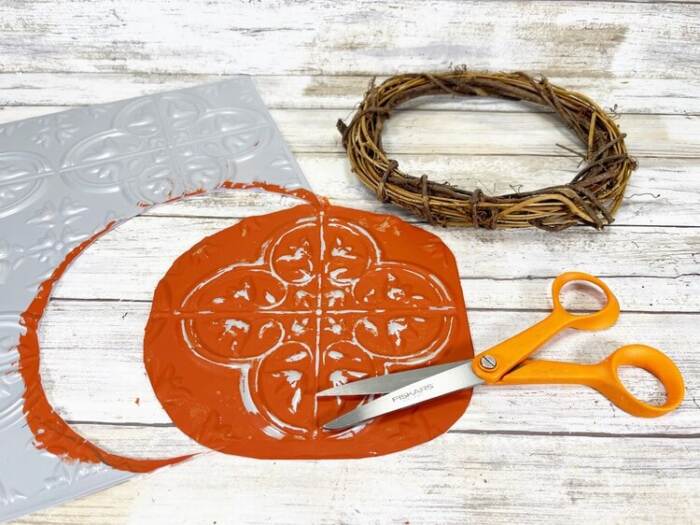
Step Four
After the paint has dried, cut out the circular shape from the tile using scissors.
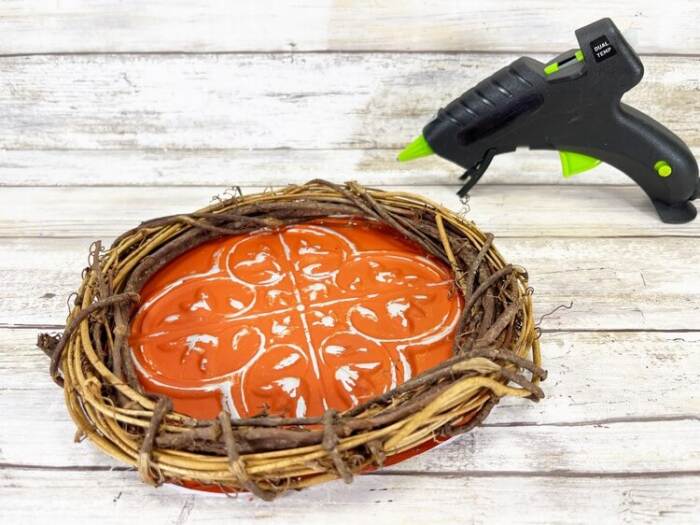
Step Five
Use hot glue to attach the faux tin tile to the back of the grapevine wreath.
Step Six
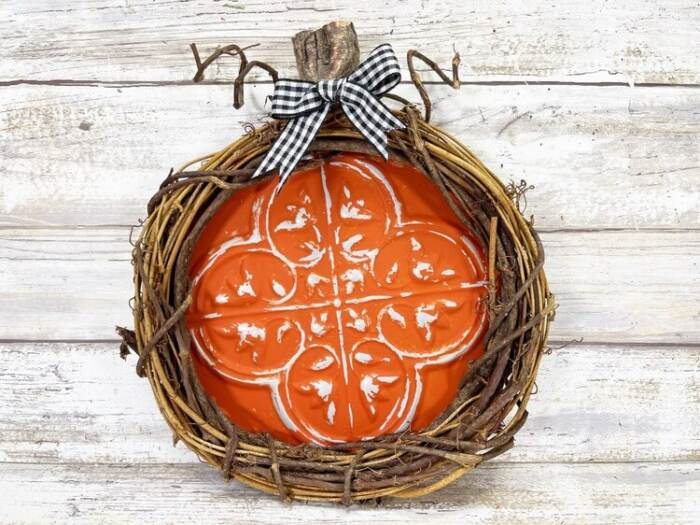
Glue a wooden stem to the top center of the wreath. Cut two curly grapevine pieces from the wreath and glue them to each side of the stem.
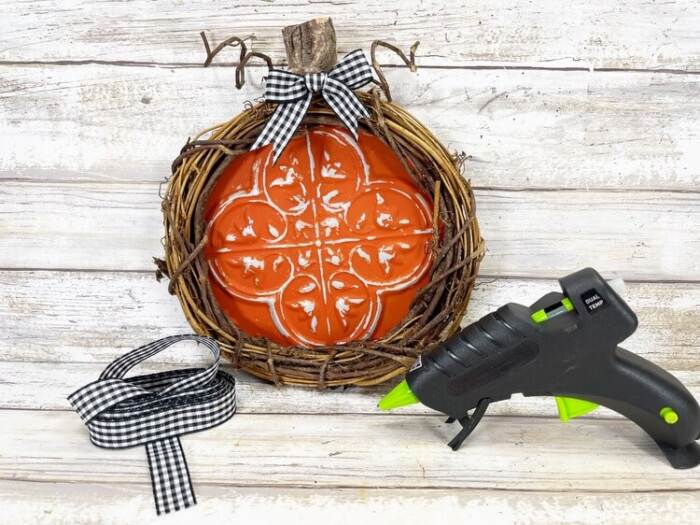
Step Seven
Make a bow with gingham ribbon and glue it to the stem. Trim any extra ribbon ends with scissors.
Ready to add a little fall charm to your home without spending a fortune? Gather your Dollar Tree supplies and make this pumpkin craft today. It’s an easy, budget-friendly project that will help you create beautiful seasonal decor you’ll be excited to display all autumn long.
More pumpkin craft ideas you’ll love.
- Hexagon Pumpkin Craft Activity
- DIY Mason Jar Lid Pumpkin
- DIY Wood Pumpkins
- Pumpkin Paper Quilling Project Frame

Dollar Tree Pumpkin Craft
Materials
- Self-Adhesive Faux Tin Wall Tile – Dollar Store
- Gingham Ribbon – Dollar Store
- Wood Stems – Dollar Store
- Glue Gun and Glue Sticks – Dollar Store
- Grapevine Wreath 8” – Craft Store
- Acrylic Craft Paint – Dark Orange
- Paintbrush
- Scissors
- Permanent Marker
- Paper Towel or Baby Wipe
Instructions
STEP ONE
- Gather all supplies. Remove the tags and packaging from all supplies and materials. Lay the tile on your work surface and trace around the outer perimeter of the grapevine wreath with a permanent marker.
STEP TWO
- Basecoat the traced area of the faux tin tile with dark orange acrylic craft paint.
STEP THREE
- Before the paint has a chance to dry, gently wipe away some of the paint from the raised areas of the faux tin tile with a damp paper towel or a baby wipe. This lets some of the grey of the tile show through.
STEP FOUR
- Once dry, cut out the circular shape from the faux tin tile with scissors.
STEP FIVE
- Attach the faux tin tile to the back of the grapevine wreath with a glue gun and glue sticks.
STEP SIX
- Attach a wood stem to the top center of the pumpkin wreath with a glue gun and glue sticks. Cut two of the curly grapevines from the wreath and glue to the top right and left hand sides of the stem.
STEP SEVEN
- Tie gingham ribbon in a bow and attach to the wood stem with a glue gun and glue sticks. Trim any long ends with scissors.