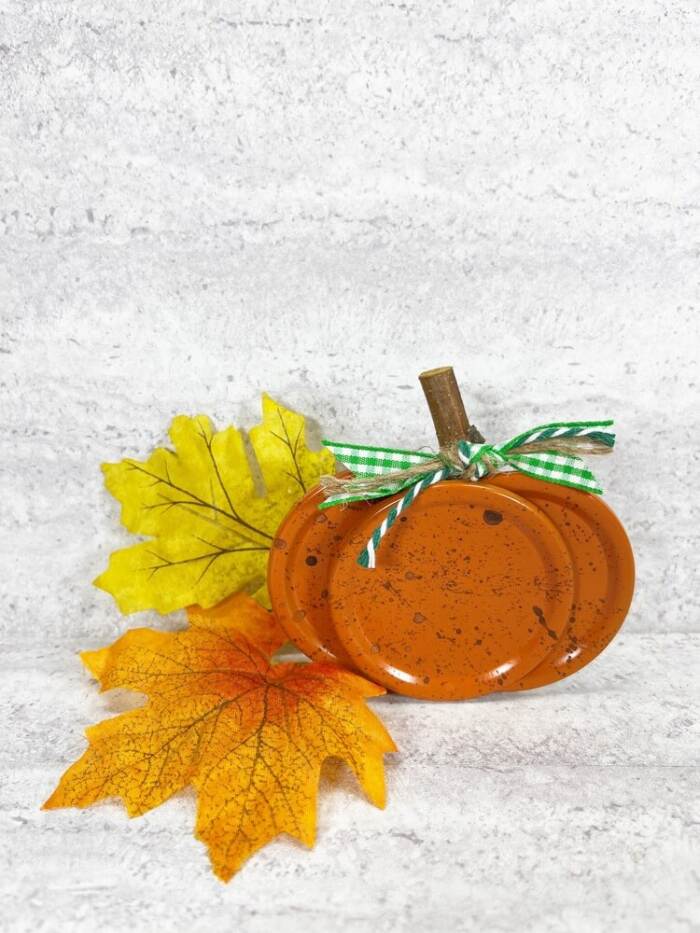
There’s something about fall that makes me want to get extra crafty, and pumpkins are always at the center of it. If you love budget-friendly projects, this DIY mason jar lid pumpkin is perfect for you.
With just a handful of canning jar lids, some twine, and a few simple touches, you can create rustic pumpkin décor that looks like it came straight out of a farmhouse shop.
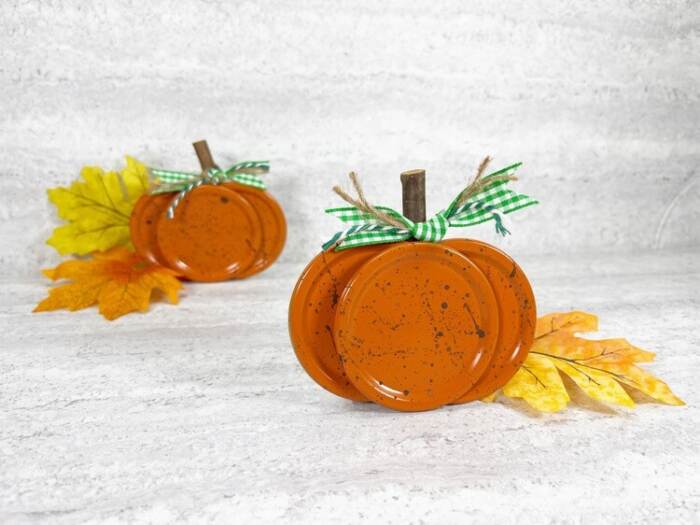
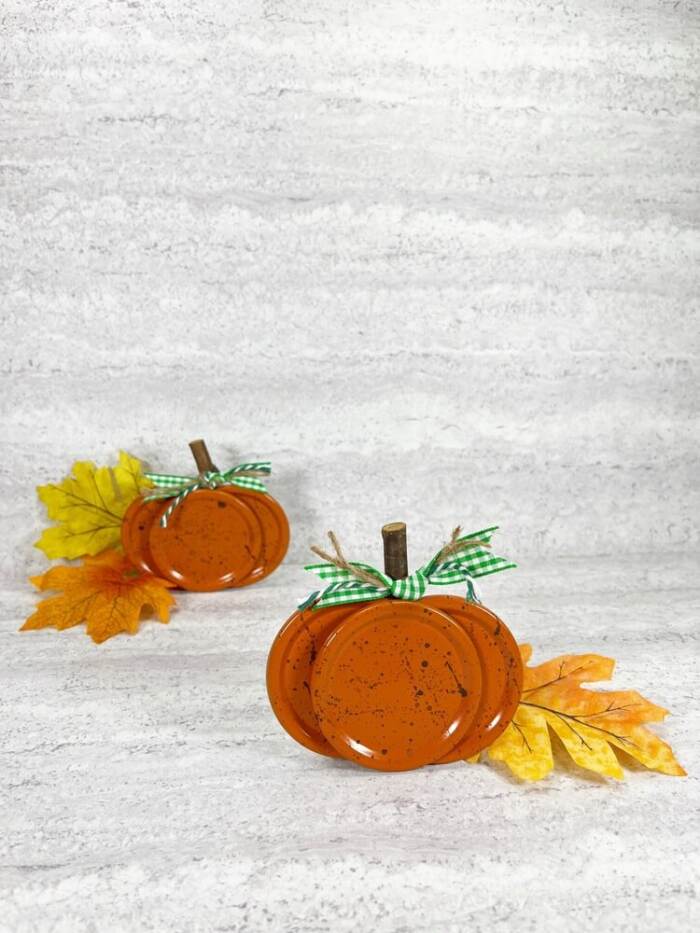
This is one of those crafts that’s as easy as it is fun. It’s a great way to use up extra lids you might already have on hand, and the finished pumpkin adds the perfect seasonal touch to mantels, shelves, or tablescapes. Plus, since it doesn’t take much time to put together, you can make several in different sizes to really fill your space with cozy autumn vibes.
Regular or wide-mouth lids both work well. Wide-mouth lids give you a larger pumpkin, while regular lids create a smaller version like we made that’s perfect for shelf décor.
Painting is optional, but it can really help your pumpkin stand out. We painted ours orange with a rustic look, but you could use orange, white, or even metallic spray paint, depending on your fall theme.
They look great on mantels, shelves, or as part of a fall centerpiece. Try making a few in different sizes for a layered, cozy autumn display.
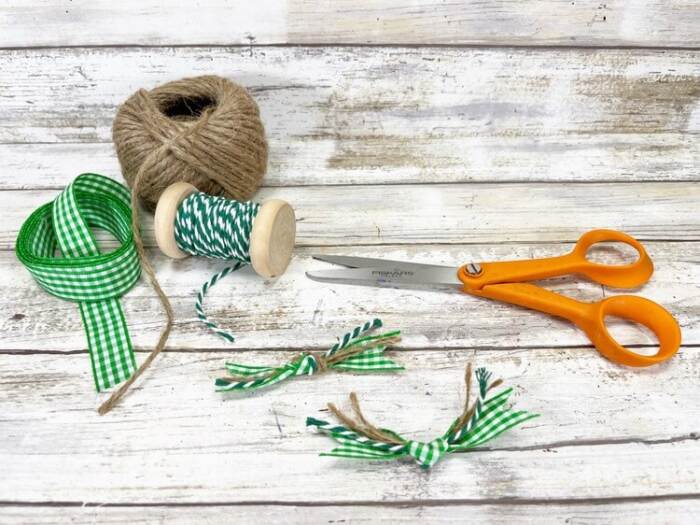
Before you get started, gather your mason jar lids and a few simple supplies. This craft doesn’t require anything fancy, and chances are you already have most of the materials at home. Once everything is ready, you’ll be amazed at how quickly these little pumpkins come together; and how cute they look when displayed.
Supplies
- Metal Canning Jar Lids – Dollar Store
- Spray Paint – Orange
- Ribbon, Twine and Trim Scraps – Assorted Greens
- Glue Gun and Glue Sticks – Dollar Store
- Wood Stems – Dollar Store
- Tumbling Tower Game Pieces – Dollar Store
- Acrylic Craft Paint – Brown
- Paintbrush
- Scissors
- Ruler

How to Make a Mason Jar Lid Pumpkin
Step One
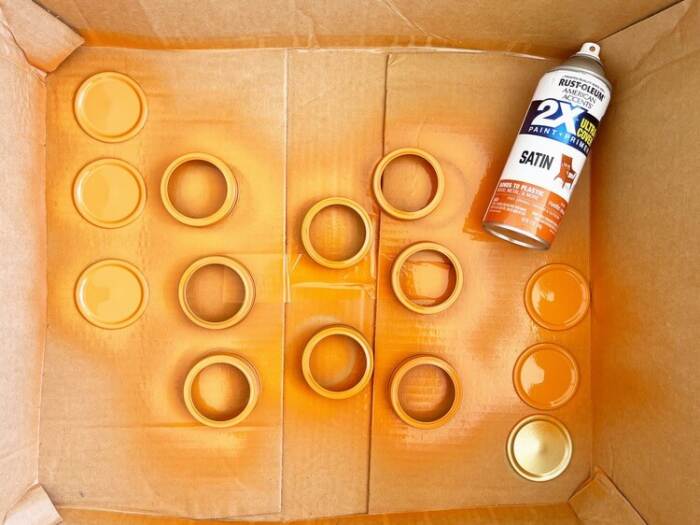
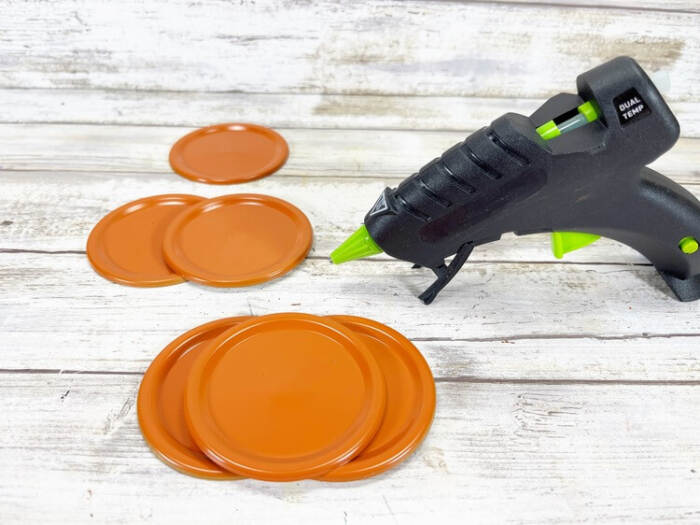
Gather your materials. In a well-ventilated area or outdoors, spray paint the metal canning jar lids orange. Apply several light coats instead of one heavy coat for an even finish. Let dry completely. You’ll need three lids for each pumpkin.
Step Two
Once the lids are dry, arrange three in the shape of a pumpkin. Remove the top lid, then glue the bottom two together with a hot glue gun. Hold until the glue cools.
Attach the third lid to the top center of the glued pair using hot glue. Hold until set.
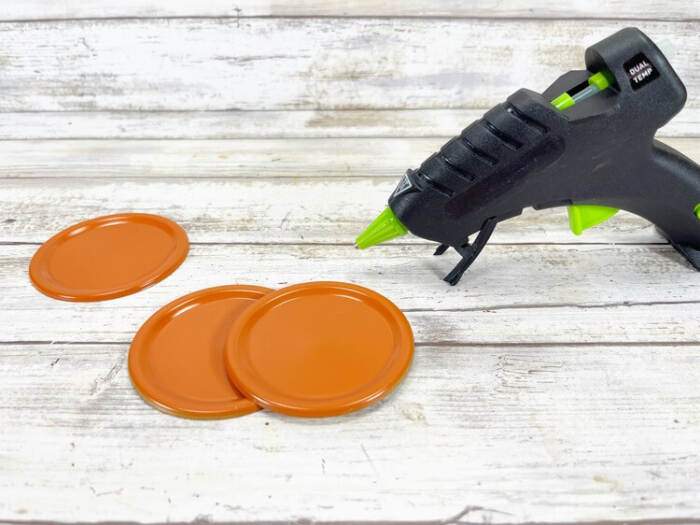
Tip: Liquid craft glue works too, but you’ll need to allow more drying time.
Step Three
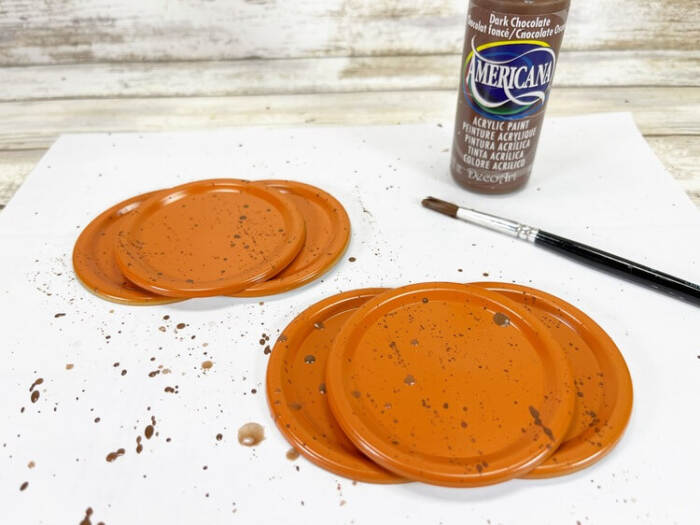
Cover your work surface with a paper towel. Mix a bit of brown acrylic paint with water, then flick the mixture onto the pumpkin with a paintbrush to create a splatter effect. Let dry.
Step Four
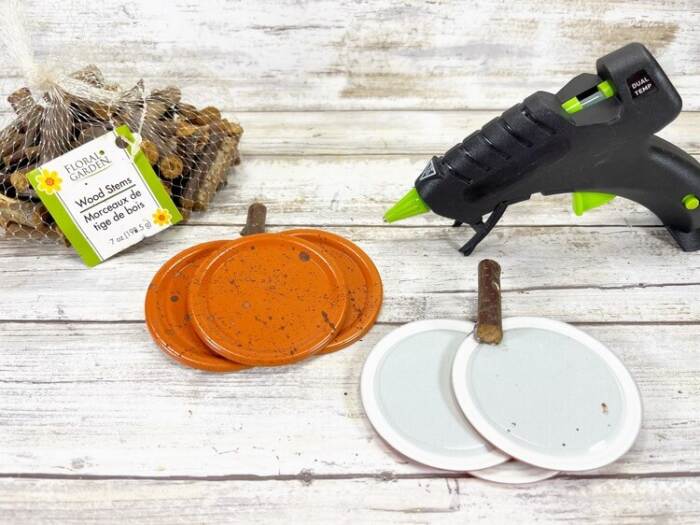
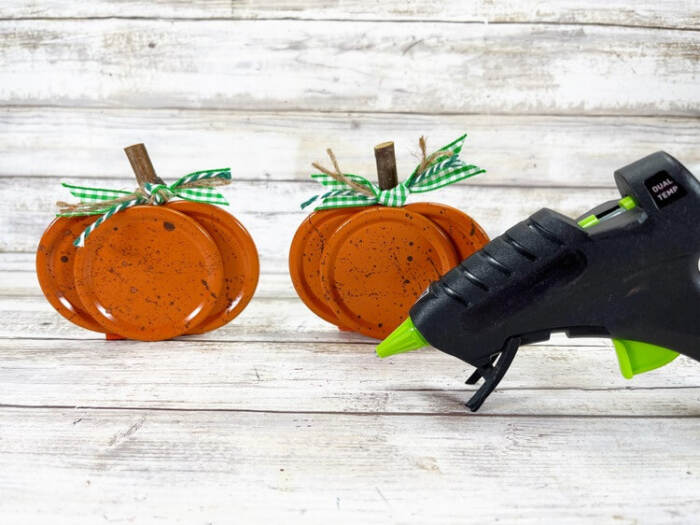
Flip the pumpkin over and hot glue a wooden stem to the top center.
Step Five
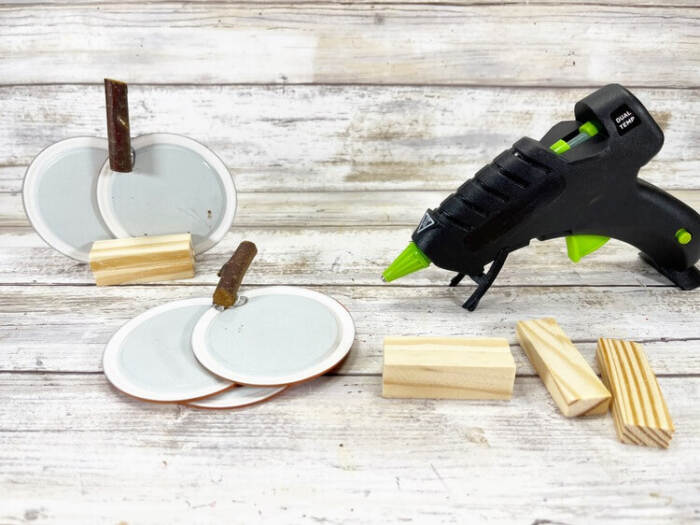
Glue two tumbling tower game pieces together for each pumpkin to make a stand. Attach the stand to the back bottom center of the pumpkin with hot glue and hold until secure.
Step Six
Cut green ribbons, twine, and trims into six-inch lengths. Tie them together in a knot to create a leaf bundle.
Step Seven
Glue the leaf bundle to the front center of the stem to finish your pumpkin.
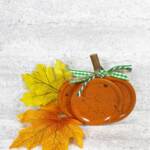
Now that you know how easy it is to make a mason jar lid pumpkin, it’s time to give it a try. Gather your supplies, add your own creative touch, and enjoy a budget-friendly fall craft that brings warmth to your home. Don’t forget to share your finished pumpkins with friends or family for a little extra seasonal cheer!
What other craft projects should I make?
DIY Mason Jar Lid Pumpkin
Materials
- Metal Canning Jar Lids – Dollar Store
- Spray Paint – Orange
- Ribbon, Twine and Trim Scraps – Assorted Greens
- Glue Gun and Glue Sticks – Dollar Store
- Wood Stems – Dollar Store
- Tumbling Tower Game Pieces – Dollar Store
- Acrylic Craft Paint – Brown
- Paintbrush
- Scissors
- Ruler
Instructions
STEP ONE
- Gather all supplies. In a well ventilated are (or outside) coat the metal canning jar lids with orange spray paint. Use several light layers instead of one heavy layer of paint. Set aside to dry. You will need three (3) lids for each pumpkin.
STEP TWO
- Once dry, position three of the canning jar lids to create a pumpkin shape. Remove the top lid and attach the bottom two lids together with a glue gun and glue sticks. Hold in place until glue cools completely.
- NOTE: You can use liquid craft glue for this project, but you will have to wait for it to dry.
STEP THREE
- Attach the third canning jar lid to the top center of the previous two lids with a glue gun and glue sticks. Hold in place until glue cools completely.
STEP FOUR
- Protect your work surface with a paper towel, dip a paint brush in brown acrylic craft paint and water, then flick on the surface of the pumpkin to create a splatter effect. Set aside to dry.
STEP FIVE
- Once dry, flip the pumpkin over and attach a wooden stem to the top center with a glue gun and glue sticks.
STEP SIX
- Glue together two tumbling tower wooden game pieces for each pumpkin to create a stand. Attach the stand to the back bottom center of the pumpkin with a glue gun and glue sticks. Hold in place until glue cools completely.
STEP SEVEN
- Measure and cut assorted green ribbons, twine, and trims into six-inch sections. Tie the assorted trims in a knot to create a leaf bundle for your pumpkins.
STEP EIGHT
- To finish, attach the ribbons to the front center of the wooden stem with a glue gun and glue sticks.