This Snowman Rope Craft is an easy and fun way to decorate for winter. It uses basic supplies and simple steps, making it a great project for all skill levels. You don’t need special tools or crafting experience to get started.
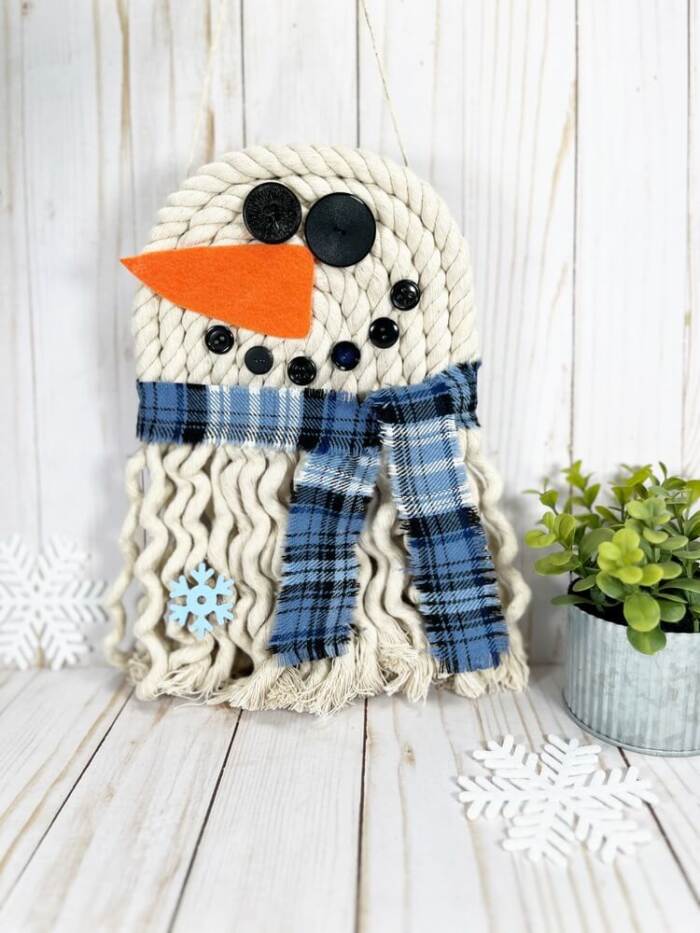
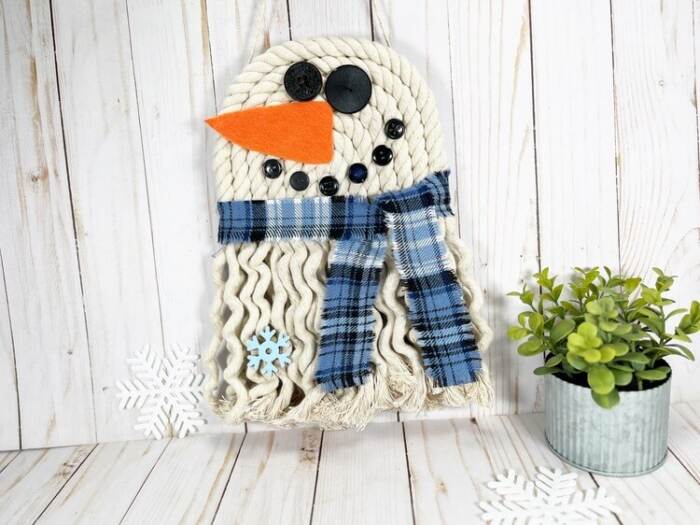
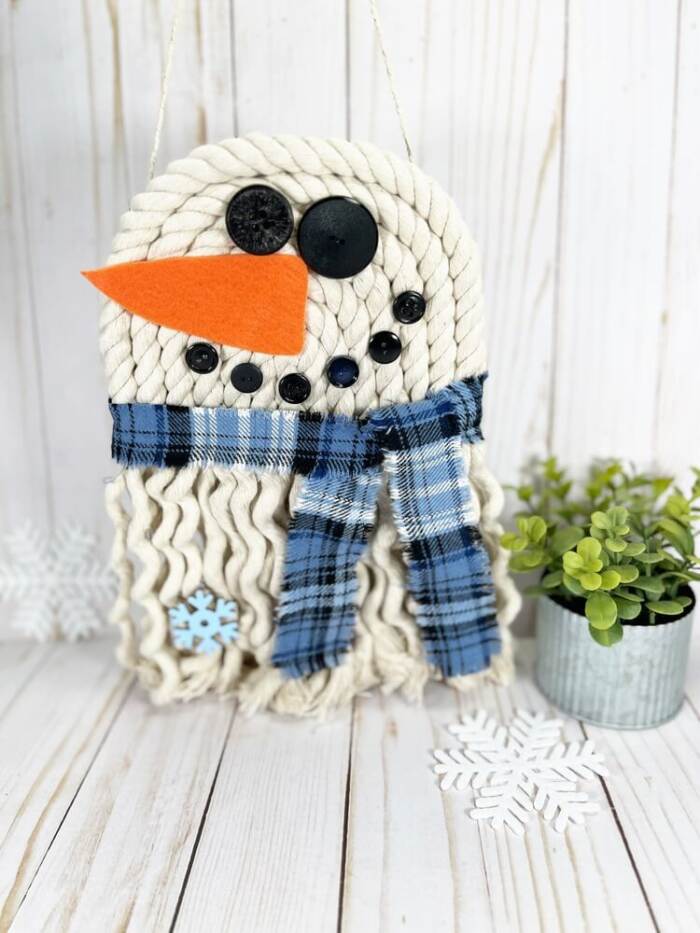
This rope snowman has a cozy, rustic look that works well for winter or Christmas decor. It looks great on shelves, walls, or entryways and is a perfect way to decorate your space. Each snowman can be decorated a little differently, which makes the craft even more fun.
If you’re looking for a budget-friendly winter project, this Snowman Rope Craft is a great choice. It’s quick to make, easy to customize, and perfect for crafting at home.
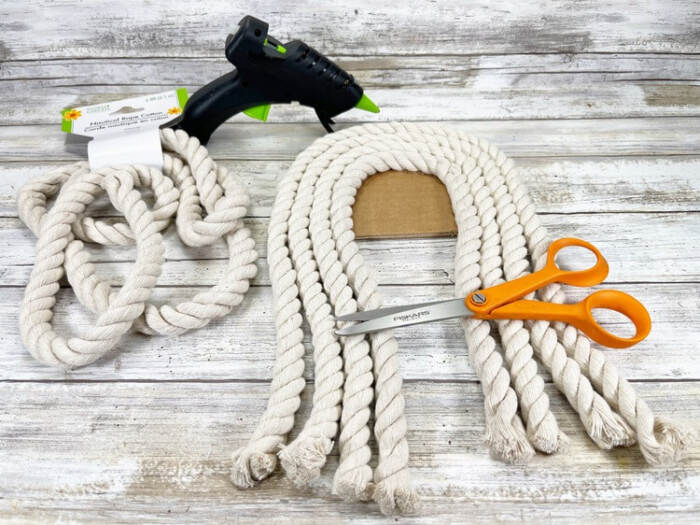
Cotton rope works best because it’s soft, easy to shape, and holds well with hot glue. A 6.8-foot cotton rope from the dollar store is usually enough for one snowman.
Yes. Recycled cardboard works great for the base. Cereal boxes or shipping boxes are thick enough to hold the rope and keep the snowman sturdy.
A glue gun works best because it holds the rope in place quickly. Craft glue may not be strong enough to secure thick cotton rope.
Supplies
- Cotton Rope, 6.8ft. – Dollar Store
- Cardboard – Recycled
- Glue Gun and Glue Sticks – Dollar Store
- Natural Jute Twine – Dollar Store
- Buttons, Black – Dollar Store
- Fabric, Plaid – Dollar Store
- Wooden Snowflake – Dollar Store
- Craft Felt – Orange
- Acrylic Craft Paint – Light Blue
- Paintbrush
- Scissors
- Ruler
- Pencil
- ROPE SNOWMAN PATTERNS
How to Make Snowman Rope Craft
STEP ONE
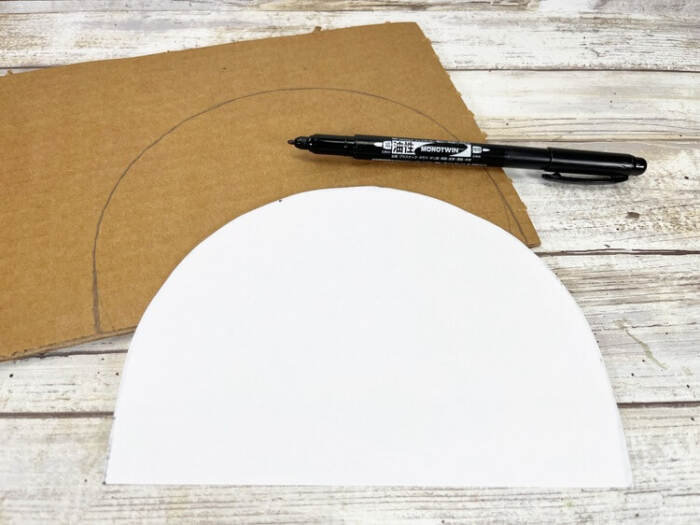
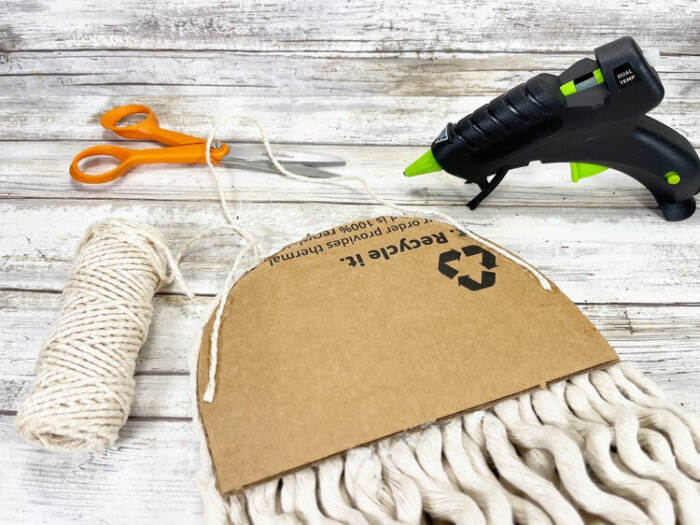
Gather your supplies. Download, print, and cut out the Rope Snowman base pattern. Trace the half-circle onto cardboard.
STEP TWO
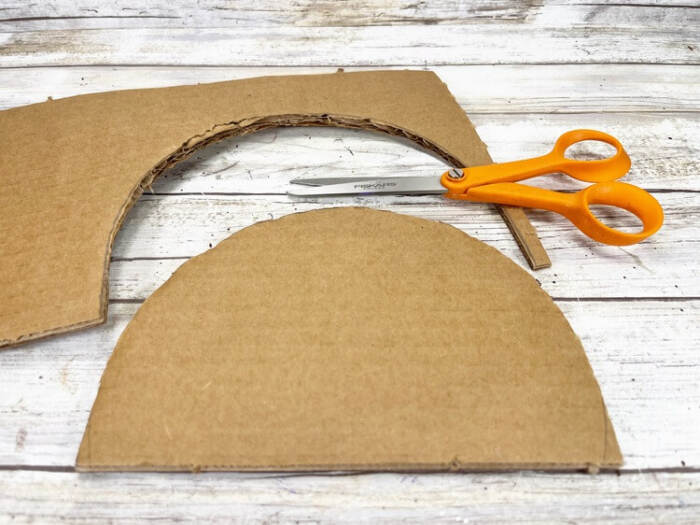
Cut out the cardboard base with scissors. Use corrugated cardboard for strength. This size snowman needs two packages of cotton rope.
STEP THREE
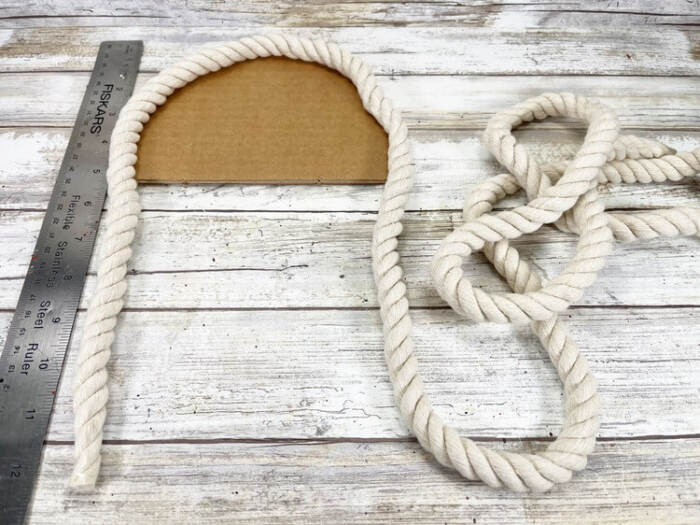
Lay the rope around the base to test the fit. Measure 12 inches from the top of the snowman to the bottom.
STEP FOUR
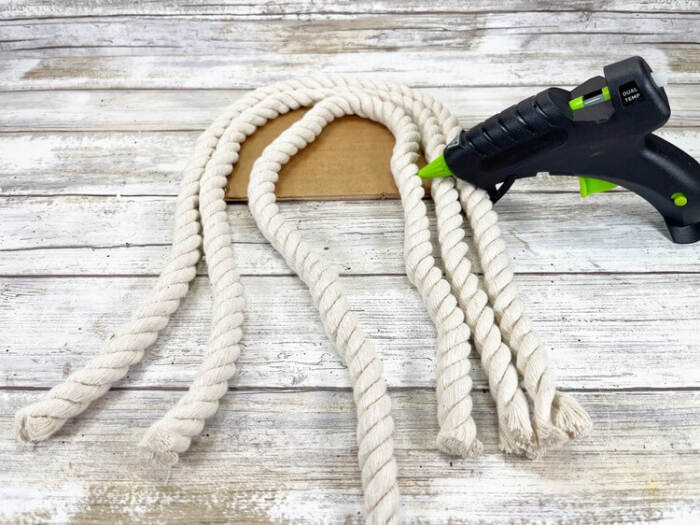
Cut the first rope piece. Glue it to the cardboard with a hot glue gun.
STEP FIVE
Fit the next rope section in place. Glue it down and trim as needed. Keep adding rope sections. Glue each piece to the base.
STEP Six

Lay the snowman flat. Trim the rope ends so they look even.
STEP Seven
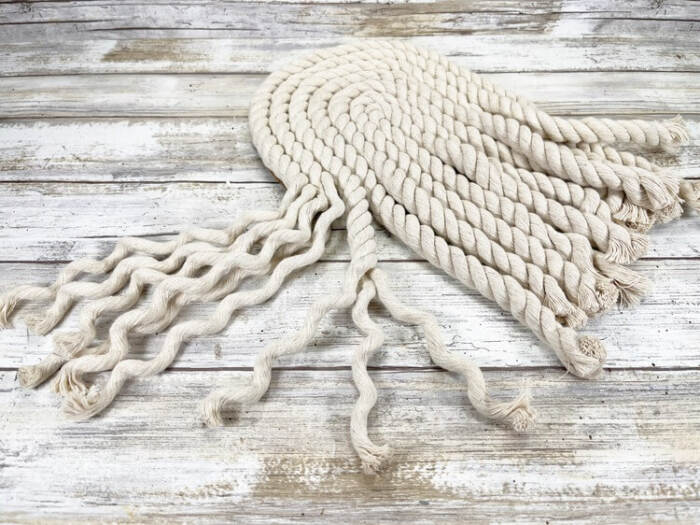
Unravel each rope strand by hand. Let the ends curl.
STEP Eight
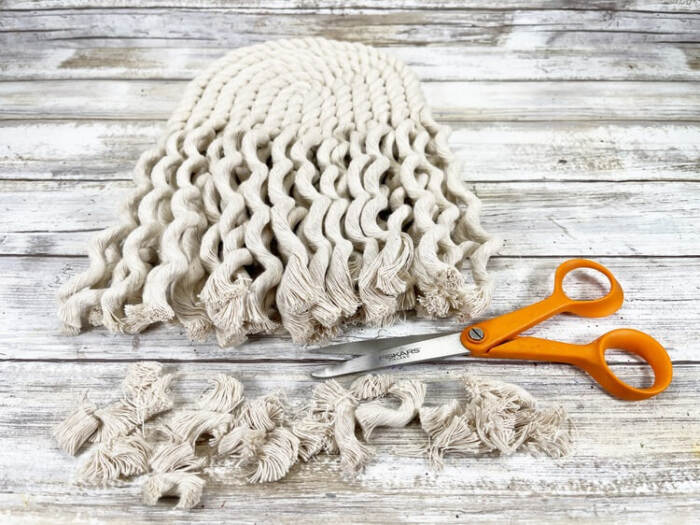
Trim the curled ends again to clean them up.
STEP Nine
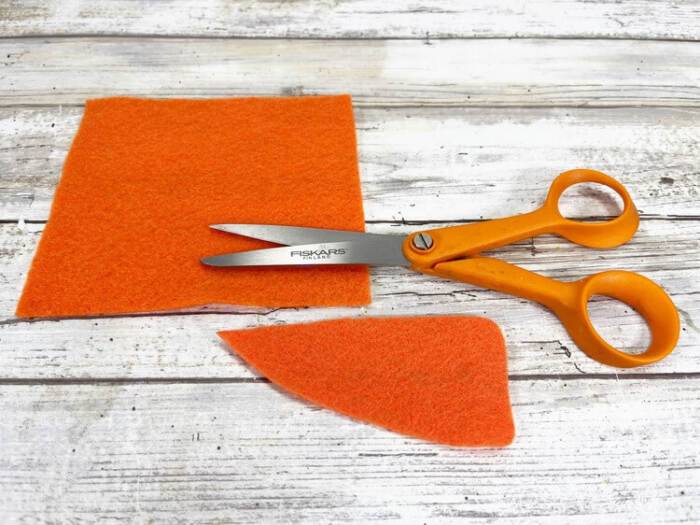
Cut a carrot nose from orange felt. Cardstock, fabric, or craft foam also works.
STEP Ten
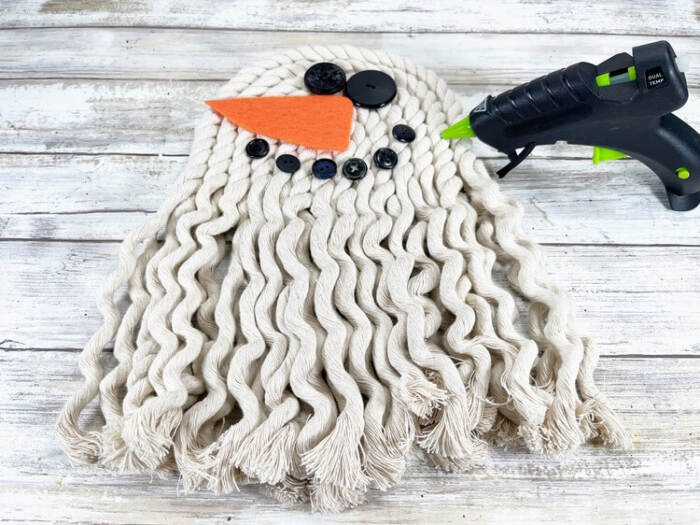
Choose two large black buttons for eyes and six medium buttons for the mouth. Glue on the buttons and nose.
STEP Eleven
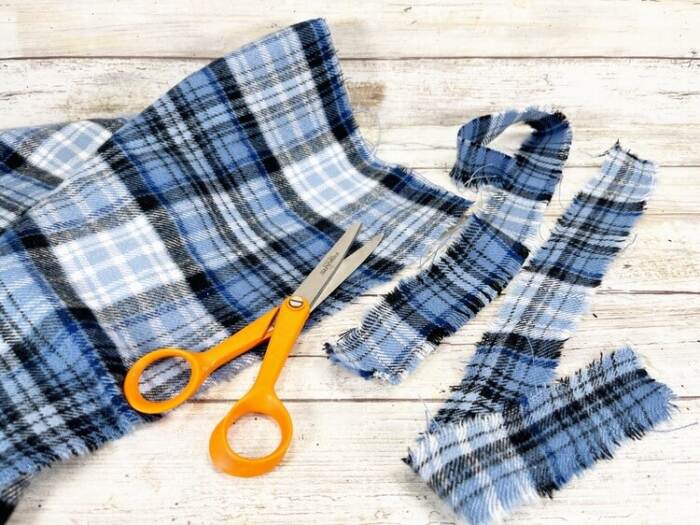
Cut two plaid fabric strips that are about 2 inches wide and 18 inches long. Snip ½ inch into one edge and tear to create frayed edges.
STEP Twelve
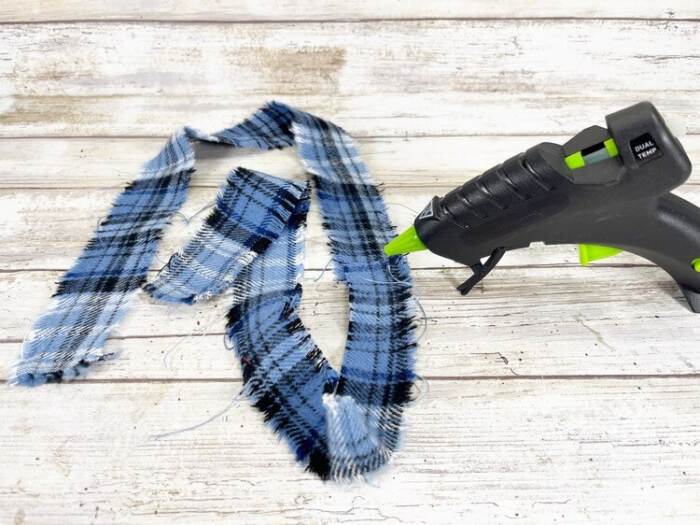
Glue the short ends together to make one long scarf strip.
STEP Thirteen
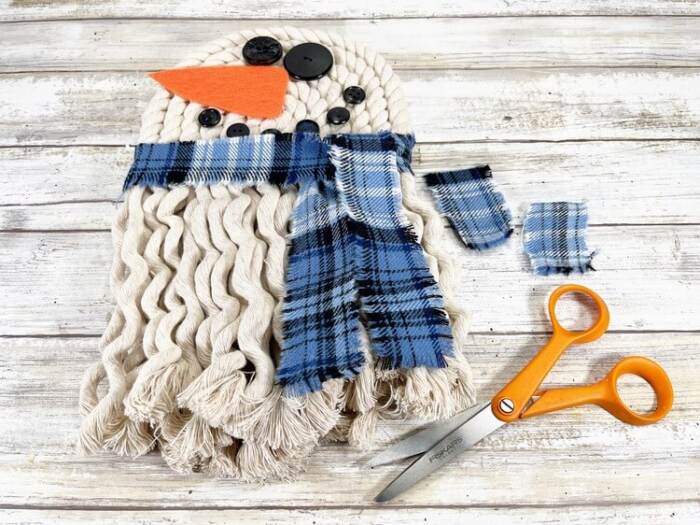
Wrap the scarf around the snowman’s neck. Glue it in place. Trim off extra fabric.
STEP Fourteen
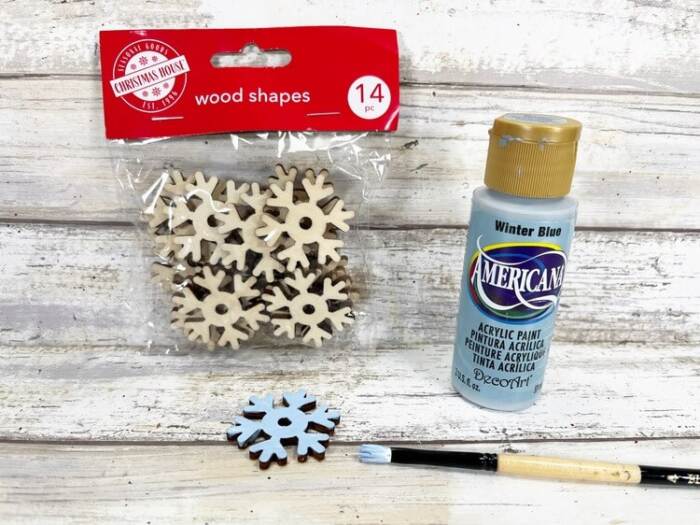
Paint a small wooden snowflake light blue. Let it dry. Add a second coat if needed.
STEP Fifteen
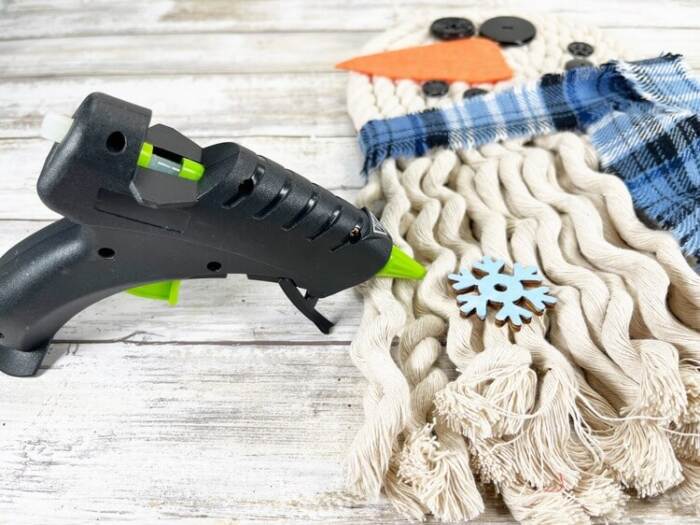
Glue the snowflake to the snowman’s body.
STEP Sixteen
Cut a 12-inch piece of jute twine. Turn the snowman over. Glue the twine to the back to make a hanger.

Ready to make your own Snowman Rope Craft? Gather your supplies, print the rope snowman patterns, and start crafting today. This cozy winter project is simple, affordable, and perfect for adding handmade charm to your home. Make one for yourself or create a few to share. Either way, it’s a fun craft you’ll love displaying all season long.
More Snowman Craft Projects:
Snowman Rope Craft
Materials
- Cotton Rope 6.8ft. – Dollar Store
- Cardboard – Recycled
- Glue Gun and Glue Sticks – Dollar Store
- Natural Jute Twine – Dollar Store
- Buttons Black – Dollar Store
- Fabric Plaid – Dollar Store
- Wooden Snowflake – Dollar Store
- Craft Felt – Orange
- Acrylic Craft Paint – Light Blue
- Paintbrush
- Scissors
- Ruler
- Pencil
- ROPE SNOWMAN PATTERNS
Instructions
STEP ONE
- Gather all supplies. Download, print and cut out the ROPE SNOWMAN BASE PATTERN. Trace the semi-circle pattern onto cardboard with a pencil.
STEP TWO
- Cut out the semi-circle Rope Snowman base pattern with scissors. The rope is pretty heavy, so corrugated cardboard makes the best base. This size snowman will require 2 packages of cotton nautical rope.
STEP THREE
- Dry fit the rope around the base, and using a ruler, measure 12” from the top of the snowman to the bottom.
STEP FOUR
- Trim the first section of rope with scissors. Attach the rope to the carboard base using a glue gun and glue sticks. If using liquid craft glue, please allow additional time for drying.
STEP FIVE
- Dry fit the next section of rope. Attach with a glue gun and glue sticks. Trim the cotton rope with scissors.
STEP SIX
- Continue adding additional sections of rope. Securing with a glue gun and glue sticks.
STEP SEVEN
- Lay the snowman flat on your work surface and using scissors, trim the ends as even as possible.
STEP EIGHT
- Unravel each section of rope by hand, leaving the lengths curly.
STEP NINE
- Give the ends of the cotton rope a final trim with scissors.
STEP TEN
- Using scissors, cut out a carrot shape from orange craft felt. Colored cardstock, heavy fabric, or craft foam would work for this project as well.
STEP ELEVEN
- Select 2 large black buttons for the snowman eyes and 6 medium black buttons for the mouth. Attach the buttons and carrot nose with a glue gun and glue stick.
STEP TWELVE
- Snip and rip plaid fabric into two strips that are approximately 2” wide by 18” long. Cut into the edge of the fabric ½” with scissors, then tear the fabric into strips. This will produce a frayed edge.
STEP THIRTEEN
- Glue the 2 short ends of the fabric strips together to create one 36” length of fabric which will become the snowman’s scarf.
STEP FOURTEEN
- Wrap with the plaid fabric around the snowman’s neck, securing with a glue gun and glue sticks. Trim any long ends of fabric with scissors.
STEP FIFTEEN
- Basecoat a small wooden snowflake with light blue acrylic craft paint. Let dry, and apply a second coat, if necessary.
STEP SIXTEEN
- Attach the wooden snowflake to the snowman’s body with a glue gun and glue sticks.
STEP SEVENTEEN
- To finish, measure a 12” length of natural jute twine and cut with scissors. Flip the snowman over and attach the jute twine hanger to the cardboard with a glue gun and glue sticks.