There’s something magical about discovering a tiny door tucked at the base of a tree or along a garden path. It sparks curiosity, wonder, and just a little bit of whimsy. DIY fairy doors are a fun and creative way to bring that magic to life, whether you’re crafting with kids or adding a charming touch to your home or yard.
With just a few basic supplies, you can create your own enchanted entrance and imagine the tiny world that lies behind it. These whimsical doors are perfect for birthdays, fairy gardens, or simply sparking imaginative play all year long.

Yes, but use weather-resistant materials like sealed wood, outdoor paint, and waterproof glue. If you’re placing the door in a garden, be sure to secure it well so it stays in place.
You can place fairy doors at the base of trees, on walls, along fences, inside flower pots, or even indoors on a baseboard or bookshelf. Just make sure the surface is clean and dry if you’re using glue or adhesive.
Absolutely! DIY fairy doors are a great craft for kids with adult supervision, especially when using hot glue or scissors. Let them paint and decorate their own designs—it’s a fun, imaginative activity for all ages.
Now that you’re ready to bring some fairy tale charm into your space, let’s walk through how to make your own DIY fairy door. This simple project is easy to customize with paint, natural materials, and fun embellishments!
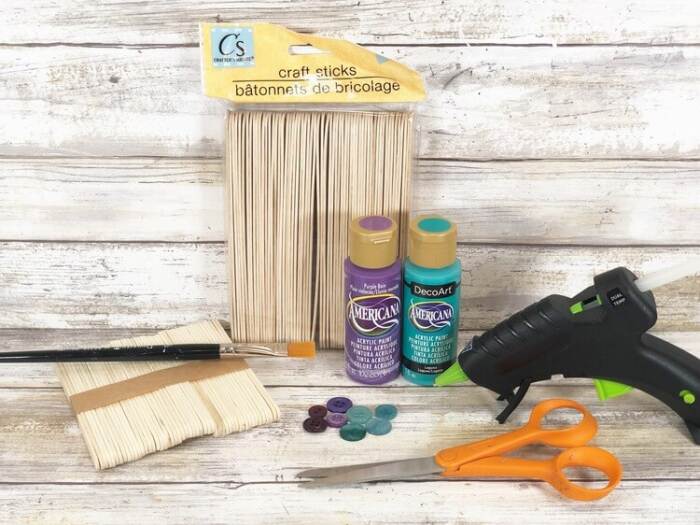
Materials
- Craft Sticks, Jumbo – Dollar Store
- Craft Sticks, Regular – Dollar Store
- Acrylic Craft Paint – Purple, Blue, Iridescent Glitter
- Glue Gun and Glue Sticks
- Buttons – Two
- Scissors
- Pencil
- Paintbrush
How to Make diy Fairy Doors
STEP ONE
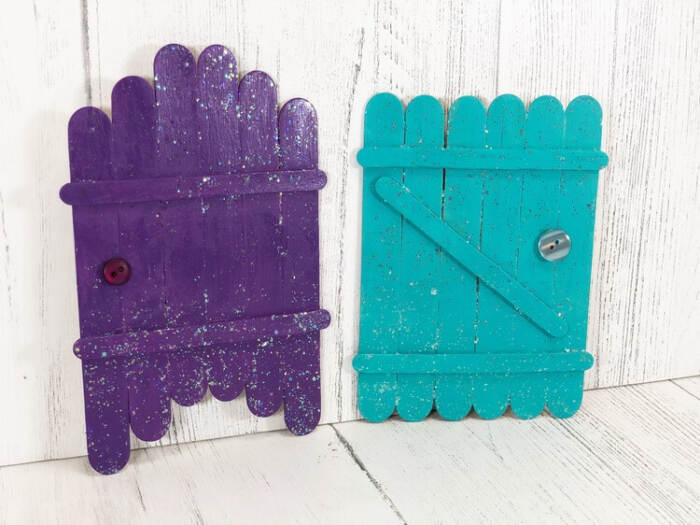
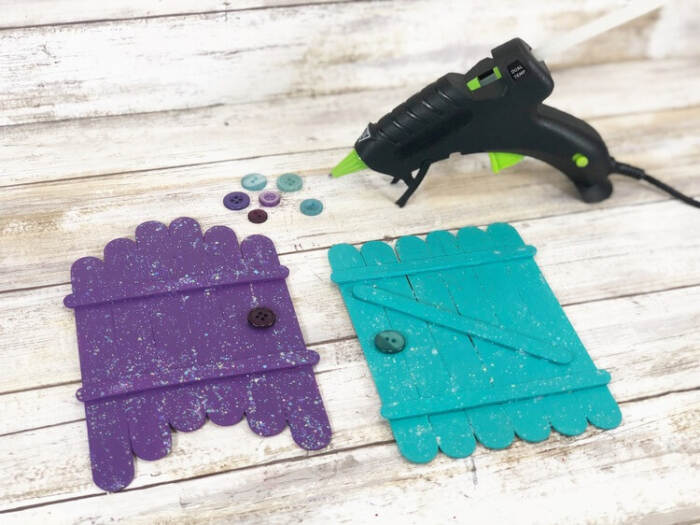
Start by gathering your materials. For the purple fairy door, arrange six jumbo craft sticks on your table, placing them in a staggered line. Glue two regular craft sticks across the top and bottom to hold them together.
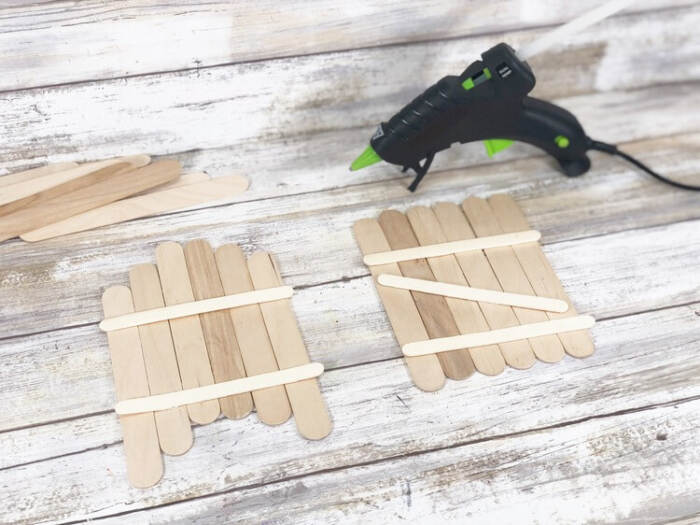
For the blue door, lay out six jumbo craft sticks side by side for a rectangle. Grab your hot glue gun and attach three regular sticks in the shape of a “Z” across the front.
STEP TWO
Paint the first door with purple acrylic paint. Coat the second one in blue. Let both dry well, then add another layer if you need more color.
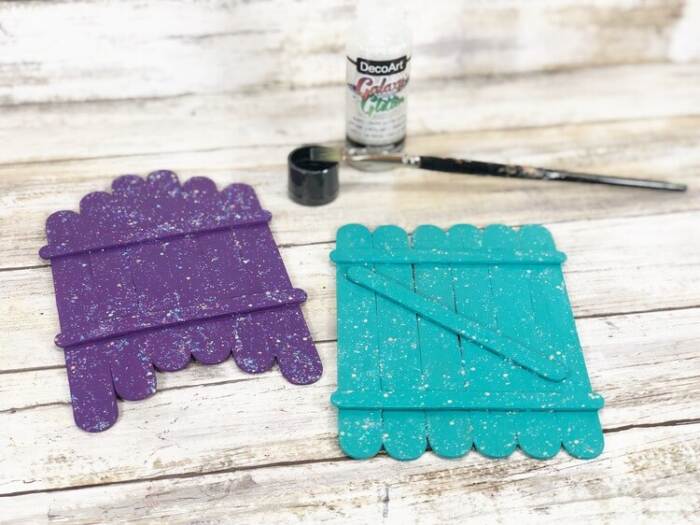
STEP THREE
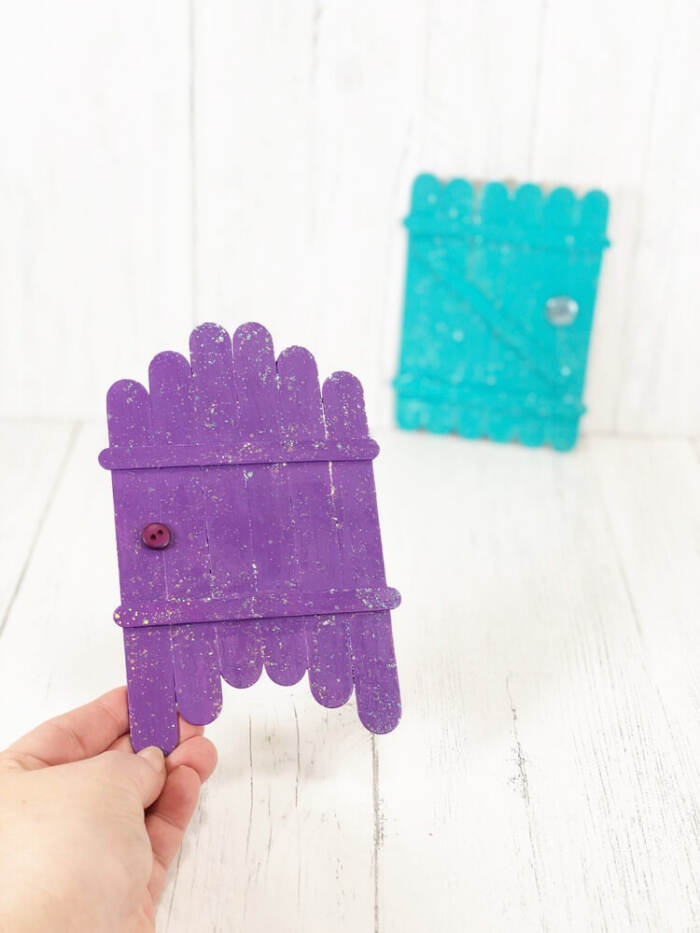
Once the paint is dry, brush on a layer of iridescent glitter paint to add sparkle. If you want extra shine, let the first layer dry and add another. You can also sprinkle loose glitter onto wet glue or use glitter glue for a similar effect.
STEP FOUR
When the glitter is set, glue a button to each door for a doorknob. A hot glue gun works quickly, but regular craft glue will do the job if you’re willing to wait for it to dry.
DIY Fairy Doors
Materials
- Craft Sticks Jumbo – Dollar Store
- Craft Sticks Regular – Dollar Store
- Acrylic Craft Paint – Purple Blue, Iridescent Glitter
- Glue Gun and Glue Sticks
- Buttons – Two
- Scissors
- Pencil
- Paintbrush
Instructions
- STEP ONE: Gather all supplies. To create the purple fairy door, line up six jumbo craft sticks on your work surface in a graduated pattern. Attach the jumbo craft sticks together by gluing two regular crafts sticks horizontally at the top and bottom.
- To create the blue fairy door, line up six jumbo craft sticks on your work surface in a rectangular pattern. Using a glue gun and glue sticks, attach three regular craft sticks in a “Z” pattern.
- STEP TWO: Paint the first fairy door with purple acrylic craft paint. Paint the second fairy door with blue acrylic craft paint. Set aside to dry and apply a second coat, if necessary.
- STEP THREE: Once dry, apply a topcoat of iridescent glitter acrylic craft paint to both fairy doors. Set aside to dry and apply a second coat, if necessary. Use liquid craft glue and loose glitter or glitter glue, instead of the glitter acrylic paint.
- STEP FOUR: After the glitter paint has dried, attach a button doorknob to each fairy door with a glue gun and glue sticks. You can use liquid craft glue for this project, but you will have to wait for it to dry.
