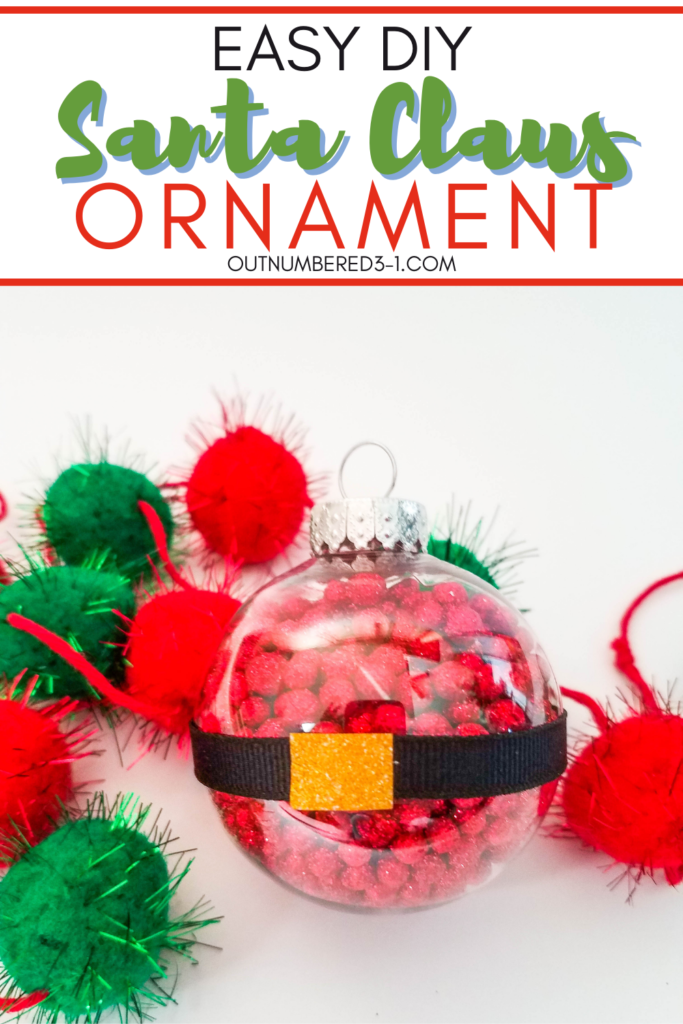
This DIY Santa Ornament is an easy craft project to make, and will look beautiful on your Christmas tree.
This simple Christmas ornament craft is such a fun and festive way to decorate to celebrate the season. Made using supplies from Dollar Tree, each ornament costs less than $1 to make. No need to update your Christmas shopping list with pricey tree ornaments when you can make these cute and festive ones instead!
How do you fill clear Christmas ornaments?
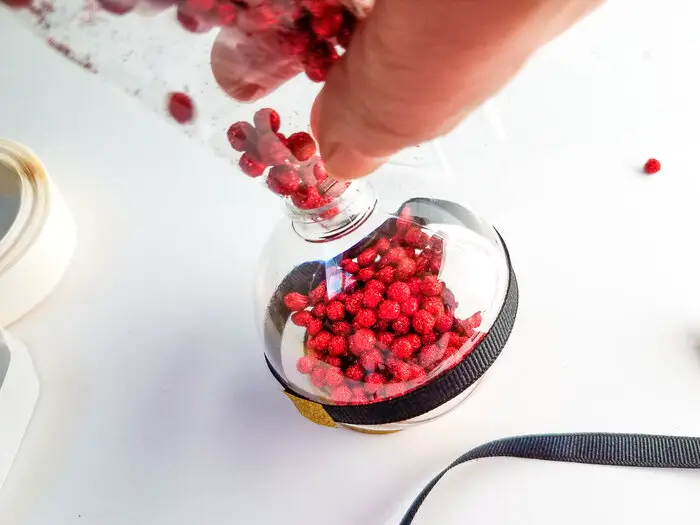
Clear round Christmas ornaments like the one used in this project are actually quite simple to fill. You can fill them carefully, right from the bag of decorative glitter balls, or you can use a small funnel, to make the process even easier.
When decorating a tree what goes on first?
You will always put the lights on first when you decorate your tree for Christmas. Once the lights are on, you can add the ornaments, garland, and picks in whichever order you would like. Some people find it easier to do garland last, and arrange it around the ornaments.
Is it bad luck to take your Christmas tree down before New Year’s?
When it comes to superstitions, it is said that you should take your tree down before midnight on New Year’s Eve, so that you will not have bad luck in the new year. However, January 5th is the 12th day of Christmas, so many people choose to gain their closure on this day.
What will I need to make my diy Santa ornaments?
You can get all of the supplies that you will need to make these diy Santa ornaments from Dollar Tree, and you can buy right from their website in bulk. However, I have added links to supplies on Amazon below, since many of you might be shopping from home.
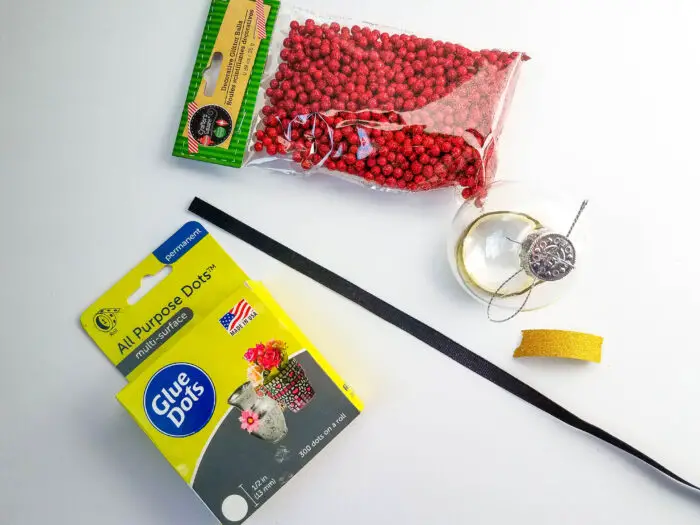
- Plastic ball ornament
- Small decorative glitter balls
- Black ribbon – ¼ inch thick
- Gold washi tape (1/4 inch – 1/2 inch wide)
- Glue dots
- Scissors
You should also check out some of our other popular Christmas crafts.

DIY Santa Ornament

Materials
- Plastic ball ornament
- Small decorative glitter balls
- Black ribbon - ¼ inch thick
- Gold washi tape (¾ inch - ½ inch wide)
- Glue dots
- Scissors
Instructions
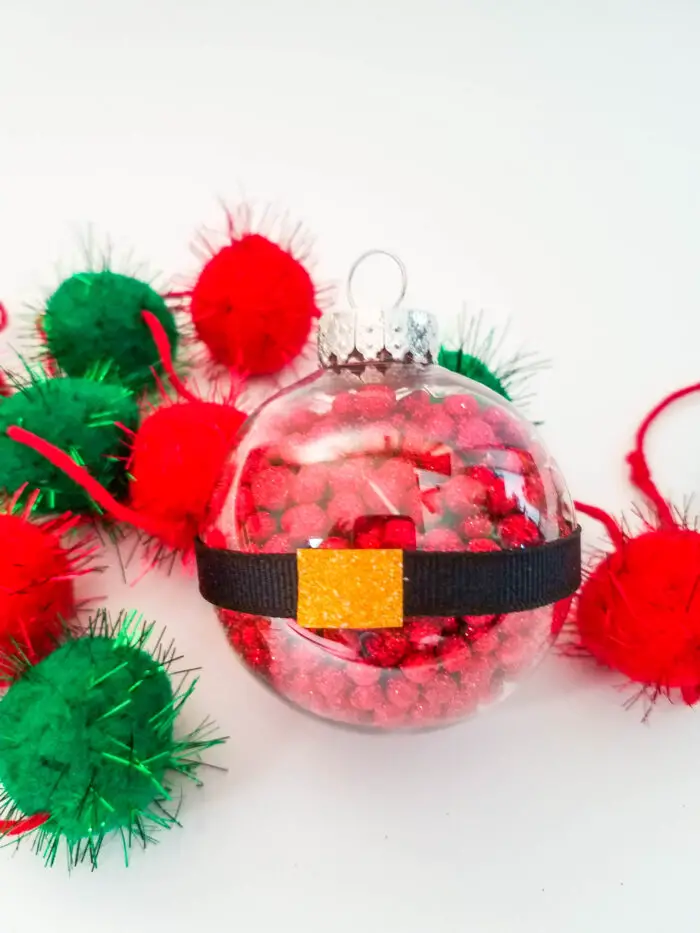
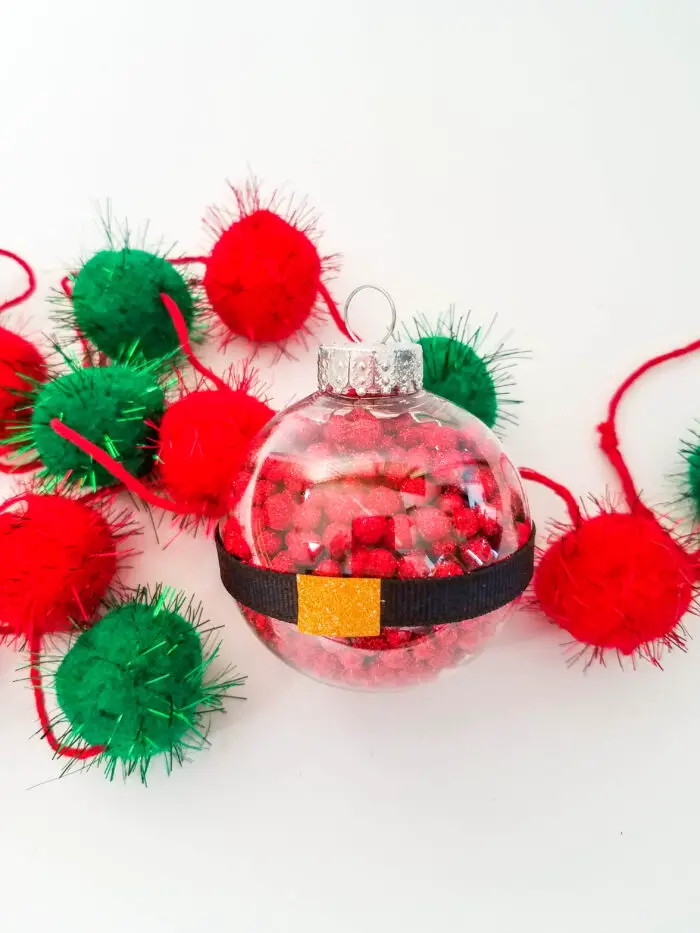
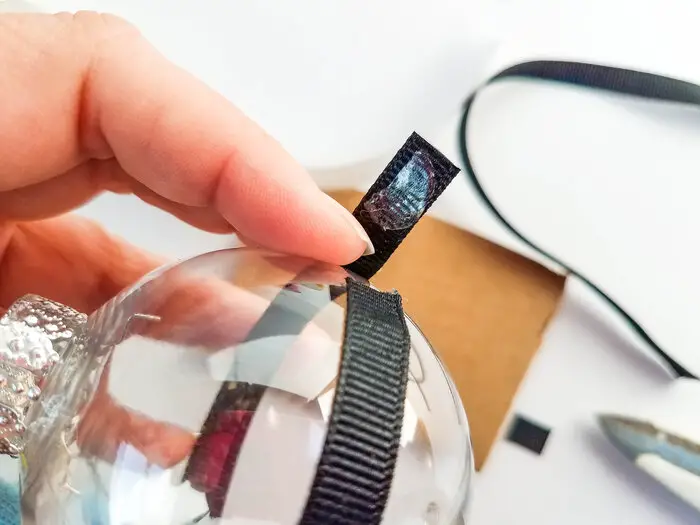
- Wrap the ribbon around the ball ornament, and cut when the ends meet.Â
- Apply a glue dot to one end, then one in the middle, and one at the other end. Make sure that the ribbon lines up and appears to look even through this process.
- Cut about ½ - ¾ inch piece of washi tape, making sure it is straight on each end. I cut a larger piece, and used an Exacto knife to make sure that the end cuts were nice and straight. Apply to the center of ribbon with a glue dot, for added sticking ability. (this becomes Santa’s “beltâ€)
- Remove the top from the ornament. Fill the ornament with the red glitter balls. Replace the top of the ornament.