I love to get crafty and this year I thought I’d make some nice little gifts for my family and friends. After I finished my Handmade Holiday Cards, I had some paper left over and since each sheet was so beautiful, I thought they’d make lovely Holiday Coasters which were inspired by the DIY Photo Tile Coaster that Shay shared last year! They turned out absolutely beautiful so I decided that I’d have to keep a set for my own holiday decor collection!
These Holiday Coasters are so easy to make and require very little supplies. They take a bit of time because of having to try between each layer of Mod Podge, but if you’re making a bunch at once, some sets can dry while you’re making others. Since each coaster costs just pennies to make, they’re totally worth every second of time it takes to make them though!
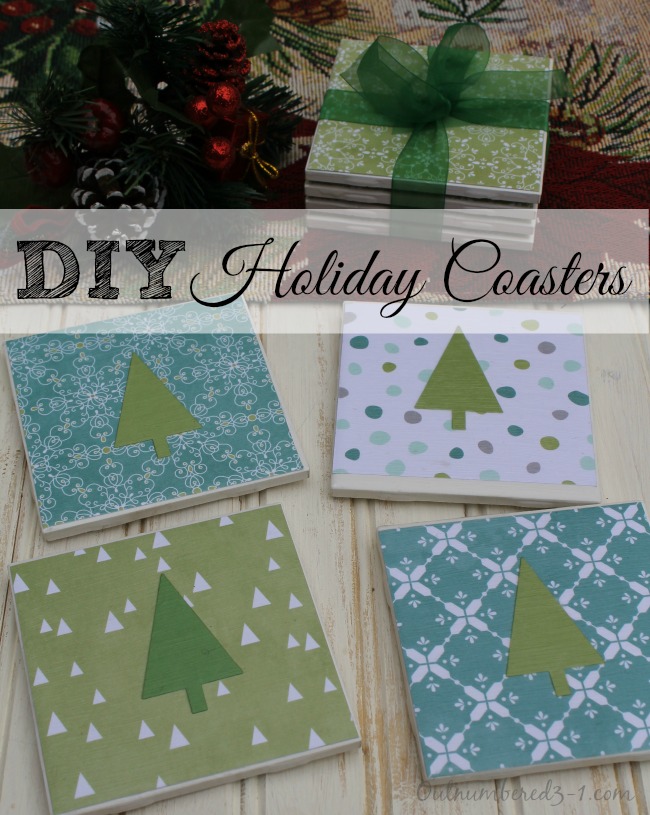
You’ll need the following items to create your own Holiday Coasters:
- Tree Punch from Stampin’ Up!
- All Is Calm Specialty Designer Series Paper from Stampin’ Up!
- Subtles 8-1/2″ X 11″ Card Stock from Stampin’ Up! (I used the two shades of green)
- 4.5 x 4.5 ceramic tiles (Home Depot for .12 each)
- Paper cutter
- Craft Gluestick
- Foam brush
- Mod Podge
- Polyurethane – Satin Finish
- small felt pad – the sticky kind (for bottom of tile coaster)
- ribbon (if you’re gifting)

Step 1. Cut your paper and punch out your trees. You’ll want to cut each sheet about 1/4 inch smaller than your tile (mine were 4.25×4.25) so that it adheres nicely and nothing is overhanging. Trust me on this because I had to learn the hard way, making my first tile look horrible! You’ll cut 4 of each paper print that you plan to use, so each set contains 4 finished tiles. Go with a coordinating color when punching out your trees. Place each set of trees on the cut paper and set aside. This way you won’t accidentally use the wrong color trees if you’re using multiple paper patterns like I did.

Step 2. Attach a small felt pad to each of the 4 corners on the bottom/back of the tile.
Step 3. Using your craft glue stick, adhere a coordinating tree to each cut piece of paper. Pat down gently and set aside.

Now for the fun (and messy) part!
Step 4. Grab a foam brush and your Mod Podge and brush it all over the front of the tile. Lay your paper on and smooth out. Apply another layer of Mod Podge and set aside to dry. Repeat this step 2-3 times until are areas are nicely glued.

Step 5. After the final coat of Mod Podge has dried, apply a layer of Polyurethane and let dry completely. This can take quite awhile. I let mine sit overnight. Now your Holiday Coasters are complete and you can gather them in sets of 4 to add ribbon if desired. I’ll let you use your own creativity for this part!

