
I’ve found a deep love for gardening over the years, and have learned to start plants and flowers from seeds. It’s the most cost efficient way to garden, and is even cheaper when you use recycled materials to plant those seeds in. For instance, you can put a pretty spin on recycled cans by making these polka-dot upcycled can planters. Upclycling soup and veggie cans to use is projects is super easy, and I’ll show you how to complete this project step by step through the tutorial below. This post is sponsored by True Leaf Market, though all opinions are my own.

True Leaf Market Flower Seeds are my favorite seeds to garden with, because there is such a great variety to choose from. They offer annual and perennial seeds, so they are ideal for all of my garden needs. True Leaf Market also offers compressed soil pucks, planting trays, and pretty much anything else you may need to plant flowers, as well as herbs and vegetables. They’ve even got planters and growing racks, as well as growing kits. True Leaf Market is a one stop shop for your home gardening needs.

I used one of the growing kits to start some Sweet William perennial flowers. Then I did the annual flower seeds in my polka-dot upcycled can planters.

How to make polka-dot upcycled can planters
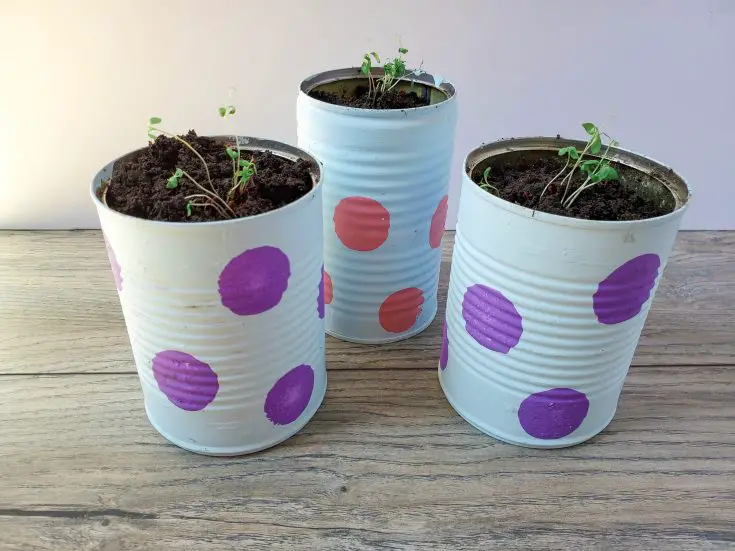
These polka-dot upcycled can planters are really easy to make, and this is even a great project to get the kids involved in. Since most families across the nation are doing school at home during this time in our country, you could use this as a home-school flower growing activity, as well as an art project.
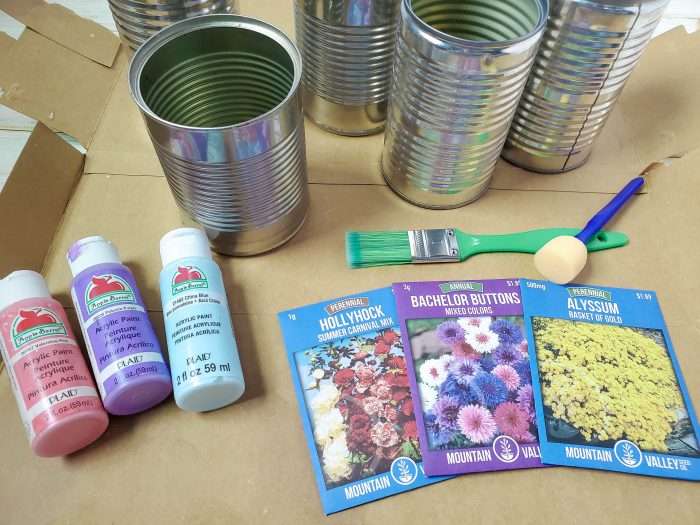
Supplies:
- Recycled tin cans (washed and dried)
- Acrylic paint(at least two colors)
- Small paint brush
- round foam brush
- soil
- flower seeds
Instructions:
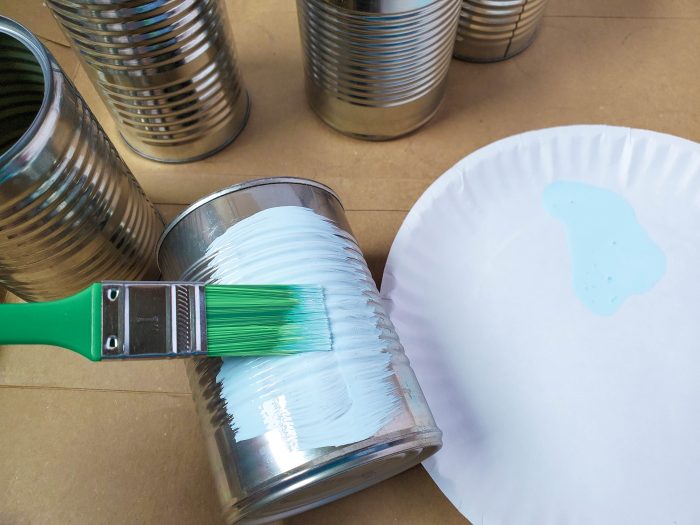
Step 1. Paint the tin cans. You may have to do two coats. Allow paint to dry in between each coat.
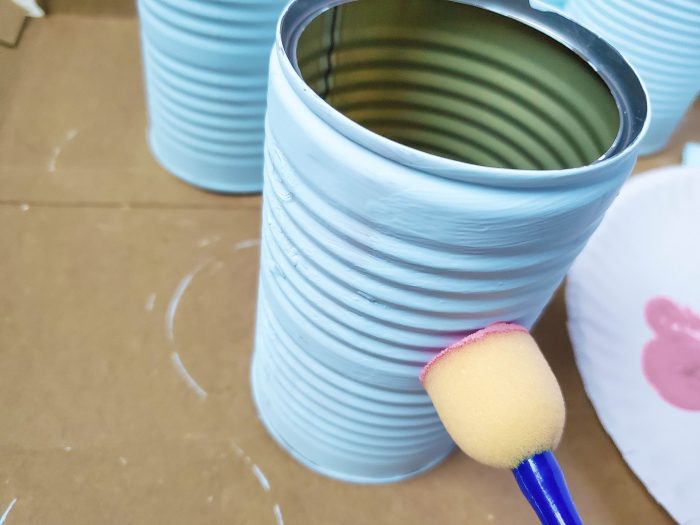
Step 2. Once your painted cans are dry, stamp dots onto the cans using the circle foam brush. Allow to dry.
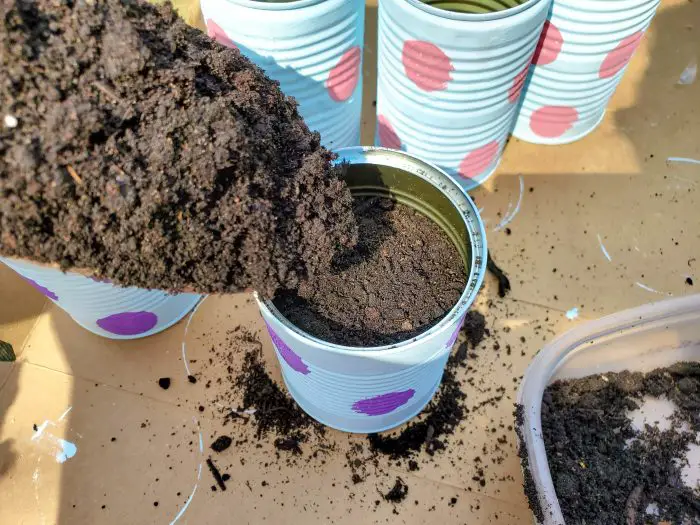
Step 3. Once painted cans are dry, you may start planting your flowers! Fill the cans with dirt.
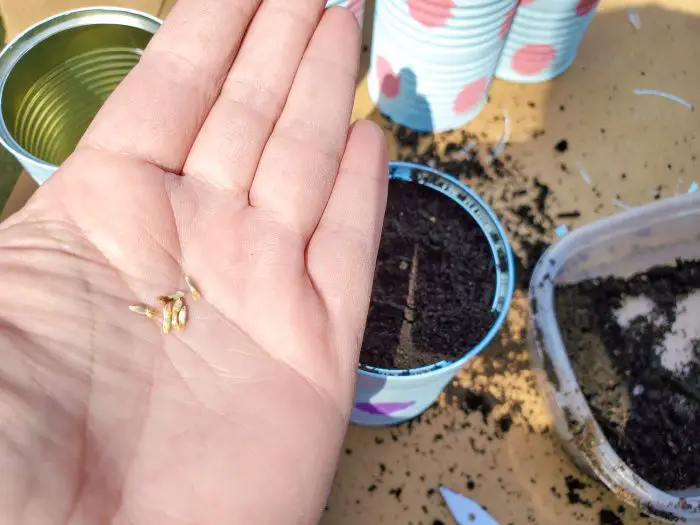
Step 4. Gather your seeds, and poke a hole in center, then plant according to planting depth instructions on back of seeds packet.
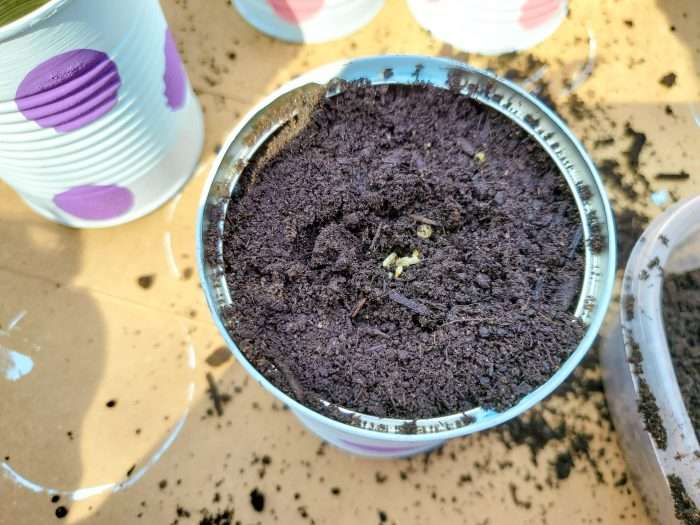
Step 5. Cover seeds with soil and water. Place in a sunny spot and watch them grow, making sure to water daily with a spray bottle.
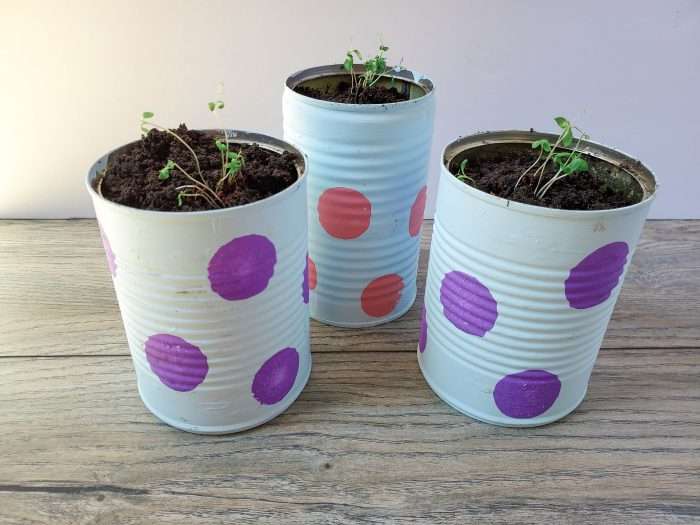
Before your know it, you will see seedlings start to grow!
Polka-dot Upcycled Can Planters & Planting Flowers from Seeds
Materials
- Recycled tin cans (washed and dried)
- Acrylic paint(at least two colors)
- Small paint brush
- round foam brush
- soil
- flower seeds
Instructions
- Paint the tin cans. You may have to do two coats. Allow paint to dry in between each coat.
- Once your painted cans are dry, stamp dots onto the cans using the circle foam brush. Allow to dry.
- Once painted cans are dry, you may start planting your flowers! Fill the cans with dirt.
- Gather your seeds, and poke a hole in center, then plant according to planting depth instructions on back of seeds packet.
- Cover seeds with soil and water. Place in a sunny spot and watch them grow, making sure to water daily with a spray bottle.