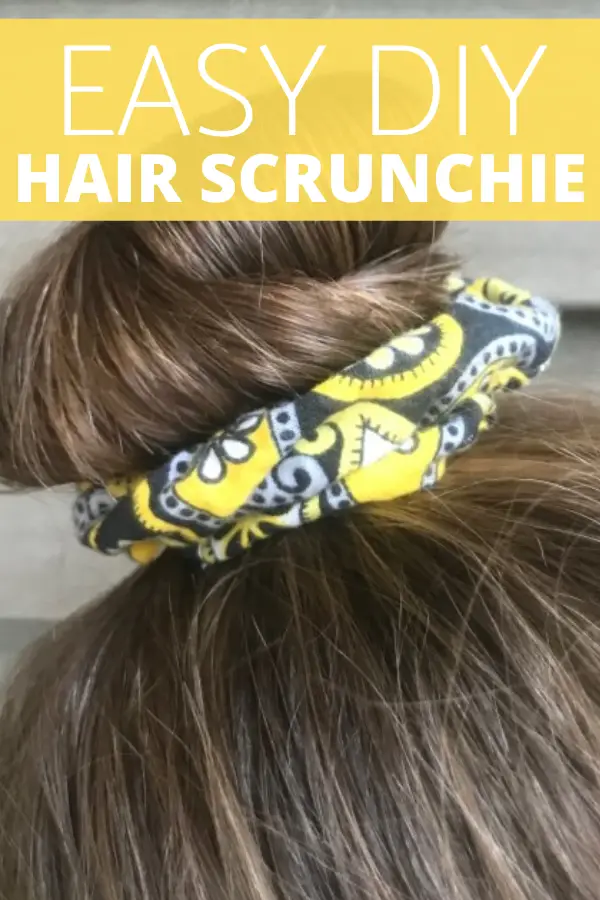
Is your daughter obsessed with hair scrunchies? Both of my girls are, so much so that my nine-year-old was wearing her friend’s hair scrunchies home. She wanted me to go out an buy her some, and I told her she had all the materials she needed to make her as many as she wanted. So today was her first sewing lesson how to make a DIY Hair Scrunchie. This post contains affiliate links.

Materials:
- Coordinating fabric
 3.5 X 22 inches for a 1 inch scrunchie {add inches in width for wider scrunchies}
 - Measuring tape or quilting ruler {pictured above}
- Sewing machine
- Chalk or colored pencil to mark your fabric
- Scissors or rotary cutter
- 1/4 inch elastic cut into 9 inch strips {I recycled old elastic}
- Matching thread
- Safety pins
- Chop sticks {something to help you}
- Fabric pins
- Iron
- Tweezers
 3.5 X 22 inches for a 1 inch scrunchie {add inches in width for wider scrunchies}
 {pictured above}
 or colored pencil to mark your fabric
 cut into 9 inch strips {I recycled old elastic}
 {something to help you}


DIY Hair Scrunchie step by step tutorial
Step 1: First you need to cut out all the fabric; however if your daughter has extremely thick hair I would add about five inches to the length of the fabric.. Once the fabric is cut you will need to iron all your strips of fabric. I even fold the fabric how I plan to sew it and iron it inside out like the example being sewn in the picture above. If you choose you can pin your fabric pieces, but it was difficult for my nine-year-old daughter to pin everything. Once you have your fabric pieces pinned sew a 1/4 inch seem from the middle seem setting.

Step 2:  Cut your 1/4 inch elastic in nine inch strips. However, if your daughter’s have extremely thick hair I would add a couple of inches in length so that you can twist the scrunchie around three times. If you refer to the picture above I lined the elastic in the middle of the fabric from the seem. I sewed the elastic to the end of the scrunchie strip. Make sure to backstitch or lock stitch with your sewing machine to secure it to your fabric strip. Make sure to add your safety pin to your elastic like the image above.
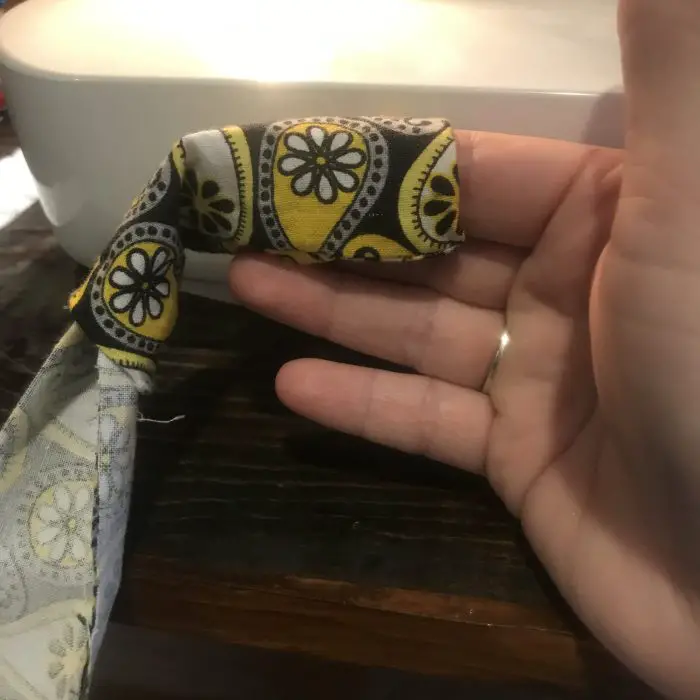
Step 3: You will no turn your fabric right-side-out. The chop stick comes in handy for this us them to push the fabric through. If the fabric gets too bunched up you can use a set of tweezers to at the end of the strip of fabric to loosen the tightness. Continue this process until the scrunchie is right-side-out. Then use the safety pin to hold the fabric in place.

Step 4: Before you secure your ends make sure to pin your elastic in place so that you do not loose it. Also make sure to before you sew that all the fabric is going in the same direction; for instance, the seem is only on one side of the scrunchie instead of twisting around the elastic.

My daughter was able to make three complete scruncies and nine almost completed scrunchies in a days worth of sewing. Not too bad for her first sewing lesson.

Has this tutorial been helpful?