I’ve partnered with Nature’s Path to bring today’s turtle magnet craft?to you. However, all opinions are my own.

Animals are a huge part of this world and we can really learn a lot from them. But did you know that there are many animals that are actually endangered? Well it’s true and I’m excited to partner with Nature’s Path to share this adorable turtle magnet craft project and tell you all about the EnviroTrip contest, where you could win a trip to help endangered animals!

EnviroTrip Contest Information
Nature’s Path EnviroKidz hosts this amazing EnviroTrip contest each year and this year’s destination is Belize. Families who win the EnviroTrip contest are able to join EnviroKidz on an adventure to save endangered species like Sea Turtles, Koalas, Chimpanzees, Gorillas, Lemurs and more. These adventures aren’t only helpful to animals, but they’re educational and fun. What a great way to spend time together as a family!

Watch the video below to learn more about where you’ll stay and what you’ll do if you win the EnviroTrip contest!

In honor of the EnviroTrip contest and saving endangered animals, I put together this super cute turtle magnets preschool craft. This project is perfect to make at home with your own kids, or even in a classroom, while teaching kids about sea turtles and other endangered animals! Stop by the EnviroKidz blog to learn more about sea turtles and grab some sea turtles activities!
Turtle Magnet Preschool Craft
You’ll need the following supplies to make your own?Turtle Magnet Preschool Craft:
- Foam sheets – green and orange
- Googly eyes
- Rhinestone stickers
- Magnetic strip, cut into 1″ strips
- Glue dots – mini size
- Scissors

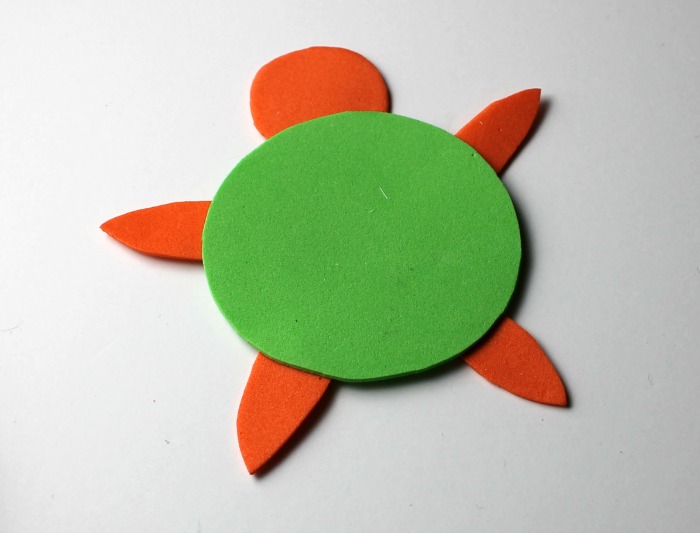
Step 1. Cut your foam into circles. I used a mason jar lid to trace 2″ circles on the green foam and a nail polish bottle to trace 3/4″ circles on the orange of foam. Cut your turtle feet in a “carrot” shape, about 3/4″ x 1/4″

Step 2. Place a glue dot on the edge of the back of one of the orange circles, which will be the turtle’s head. Adhere it slightly underneath the edge of the green circle.

Step 3. Adhere the feet by placing a glue dot on the fatter edge of each foot and adhere to the bottom of the green circle. Place two of them?about 1/2″ away from each side of the head.


Place the other two towards the bottom, in about the same position.

Step 4. Place the eyes onto the orange circle, to create the turtle’s face.

Step 5. Arrange the rhinestones on the turtle’s body. Start by placing one in the center.

Arrange 5 more rhinestones around the center one, towards the edge of the turtle’s body.

Step 6. Apply two glue dots to one side of the magnetic strip and adhere to the back of the turtle.

Your turtles should look like this once complete. Now they’re ready to hang on the refrigerator or on your office filing cabinet!

I hope that you enjoyed this turtle magnet craft project! Good luck in the EnviroTrip contest!
