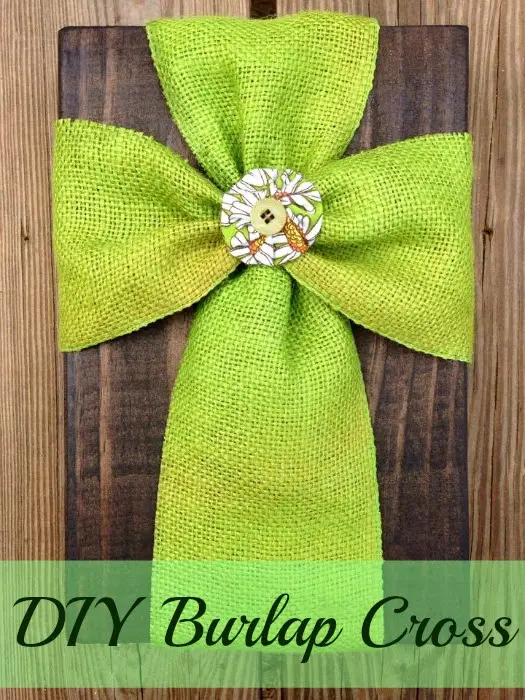
I love spring best of all the seasons! In the south we are seeing spring earlier than normal and even the pollen is in full swing. The best part about spring is Easter! Easter has become my favorite holiday since I can truly appreciate the true meaning, and I want my children to understand at an early age what He Is Risen means. What better way to celebrate than to make a beautiful decorative plaque with burlap?in the form of a T to represent the cross -What a wonderful piece to display on your mantle to remind your family of the true meaning of?Easter. ?You can keep the DIY?Burlap Cross displayed all year long. ?You may even choose your own color scheme so that it matches your decor perfectly.
DIY Burlap Cross
Materials:
2″ X 8″ piece of wood
Stain
Foam paint brushes
Fabric of choice (burlap)
Embellishments
Thread
Needle
Scissors
If you are using Burlap you will need Modge Podge
You can grab some of the materials through these affiliate links. Though I may make a very small percentage on sales through these links, it won’t cost you more.
Cut your boards to the size you want. Then stain or paint them as you wish.

Step 2:
Cut your desired fabric about 4 inches wide by at least 32 inches long. If you are using burlap water down some Modge Podge to secure the edges. Once it dries trim your edges and gather it using a needle and thread.

Step 3:
Now place a yo-yo (whatever you plan on using for your center piece) and secure it by?using a needle and thread.

Step 4:
Next?you need to place the two gathered pieces of burlap to where they are?intersecting and secure it?using a?needle and thread. ??When you have finished it should hold together by itself. ?This makes it easier to secure to the wooden block.
Step: 5:
Secure the T shape onto your wooden block using a staple gun on the backside of your block. ?I made sure that my T interlocked in the back in the shape of a cross. ?This just ensures a pretty back as well as front.