Halloween is such a fun time of year and my family loves to celebrate in all sorts of ways. We go all out when it comes to decorations and you might like this Halloween paper wreath that I shared a tutorial for a few weeks ago. Today, I’m sharing these?DIY Candy Bags for Trick or Treaters that I made with some of the items that Stampin’ Up recently sent me.

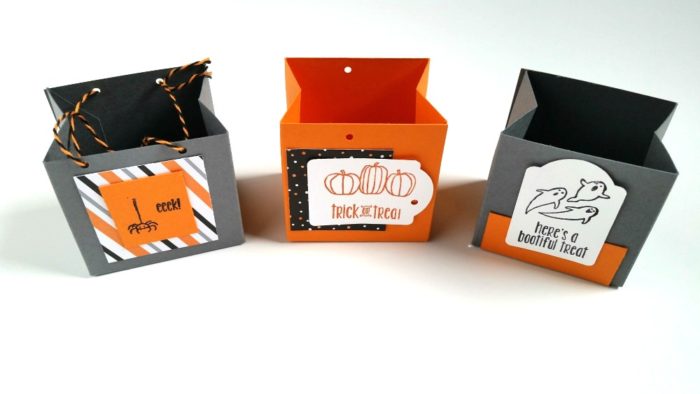
Since we live in a small little neighborhood on the lake, we get just a handful of kids for Trick or Treat. Given the size of the neighborhood and amount of houses, we like to give out treat bags with about 5 or 6 pieces of candy for each kid. I always get those cello bags that everyone uses so this year I thought it would be fun to change things up with these DIY candy bags for trick or treaters. They’re super adorable and will surely be memorable. Even better, they’re easy to make too!
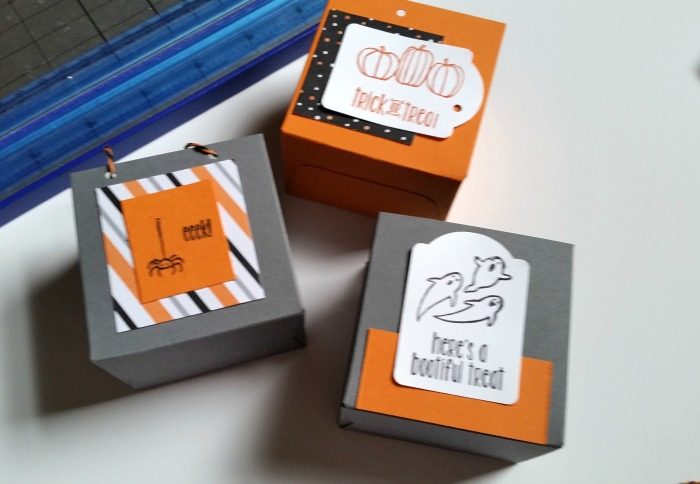
DIY Candy Bags for Trick or Treaters
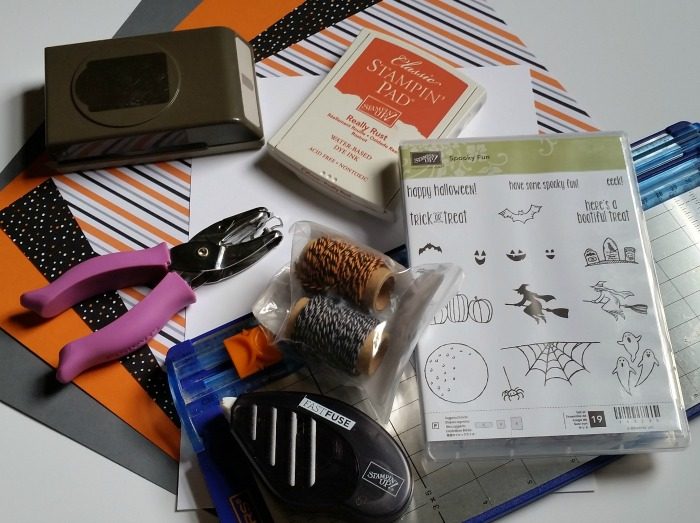
You’ll need the following supplies to make these yourself.
- Gift Bag Punch Board
- Fast Fuse Adhesive
- Spooky Fun Stamp Set
- Stampin’ Pads – orange and black
- Halloween Night Specialty Designer Series Paper
- Halloween Night 12×12 Cardstock Pack
- white cardstock
- Halloween Night Baker’s Twine
- paper trimmer
- label punch
- hole punch
Step 1. Use the?Gift Bag Punch Board and Halloween Night 12×12 Cardstock Pack to make the gift bags. Follow directions included in Gift Bag Punch Board. You can make them any size that you would like. I made mine 2.5″ x 2.5″ to fit 5-6 snack size candy bars.
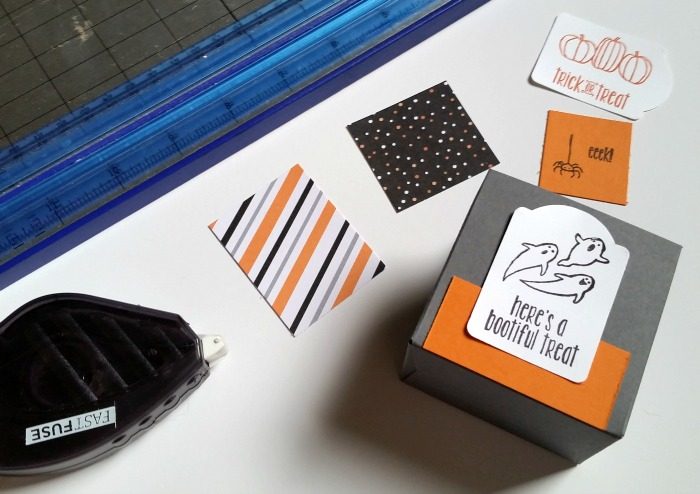
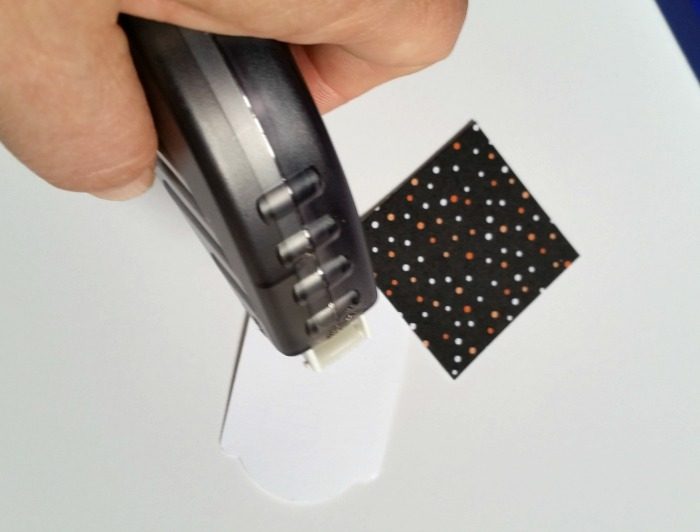
Step 2.?Think about how many bags you need to make and which designs you want to do on them, since I’ve shared 3 different designs. Then trim paper accordingly, following the directions below for each.
- eek! Spider bag – Trim orange cardstock to 1.25″ x 1.5″ and striped?Halloween Night Specialty Designer Series Paper to 1.75″ x 2.25″. Situate the “spider stamp” and the “eek! stamp” onto a clear mount and stamp onto each piece of orange paper using the blank ink. Use the Fast Fuse Adhesive to apply the orange paper to the striped paper, then attach?to the center of the front of the gift bag.
- here’s a bootiful treat bag – ?using the label punch, punch the white cardstock. Trim the same amount of orange paper to 1″ x 2.25″. Situate the “here’s a bootiful treat stamp” and “ghost stamp”?onto a clear mount and stamp onto each white label?using the blank ink. Use the Fast Fuse Adhesive to apply the white cardstock?to the orange?paper, then attach?to the center of the front of the gift bag.
- trick or treat bag -?using the label punch, punch the white cardstock. Trim the same amount of dotted?Halloween Night Specialty Designer Series Paper?to 1.75 x 1.75″. Situate the “pumpkins stamp” and “trick or treat stamp”?onto a clear mount and stamp onto each white label?using the orange?ink. Use the Fast Fuse Adhesive to apply the white cardstock?to the dotted?paper, then attach?to the center of the front of the gift bag.
Optional step 3. Use the hole punch to punch holes in the top of the bag and attach the Halloween Night Baker’s Twine to each bag.
Each bag is now finished and can be filled with candy for trick or treaters.
Hope you have fun crafting! Check out some of our other Halloween ideas!
