I’m sharing easy to follow tips on planting full flower pots and how to make a simple diy painted flower pot. This is beginner gardening friendly, so you don’t even need a green thumb!
This was orginally a sponsored post with Collective Bias and Miracle Gro.
I have a serious love for gardening and that’s a big reason why the spring and summer are my favorite seasons of the year. The moment the snow and cold subsides, I run out and check on my garden beds daily for new growth. It takes forever for all of my perennials to bloom, so I anxiously await the arrival of flowers in my local garden centers so that I can plant in pots for my front steps and other areas of the yard. In this post, I’m going to show you how to plant beautiful & full flower pots and also show you how to make your own painted flower pot!
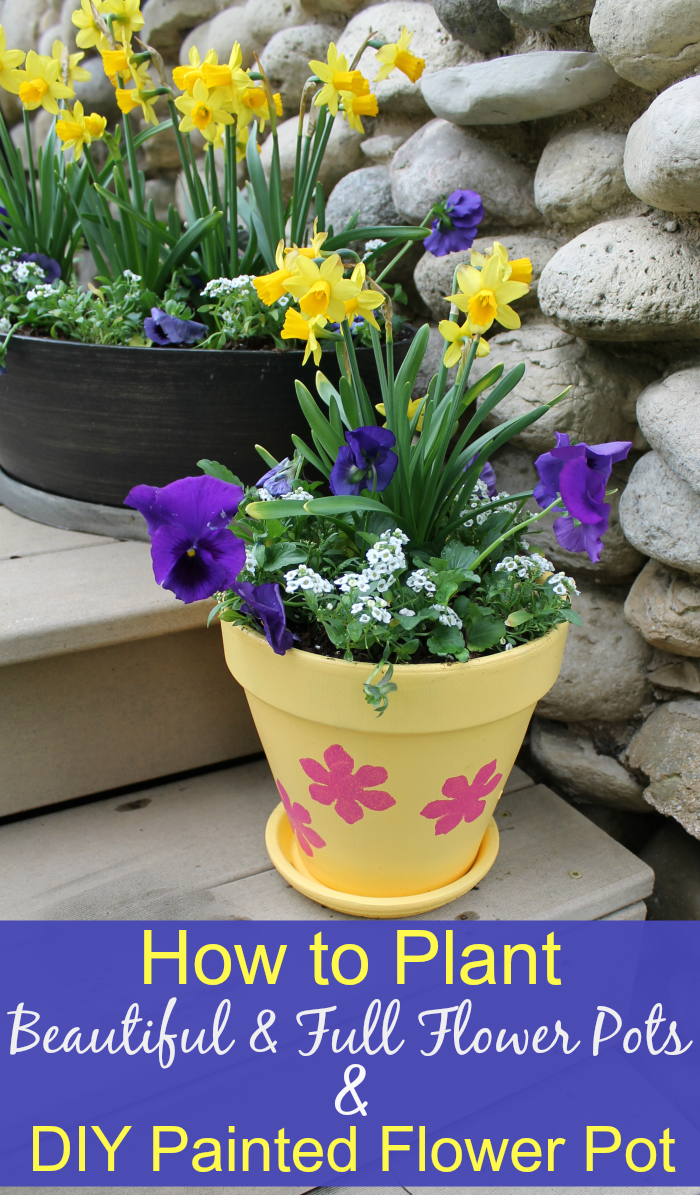
How to Plant Beautiful & Full Flower Pots

The first secret to planting beautiful & full flower pots is in the soil. You really need a good potting mix, like Miracle-Gro Potting Mix because it helps plants to grow twice as big versus unfed plants. It also feeds them for up to 6 months, so they’ll stay healthy all season long. After all, large and healthy plants are what makes container gardens beautiful!
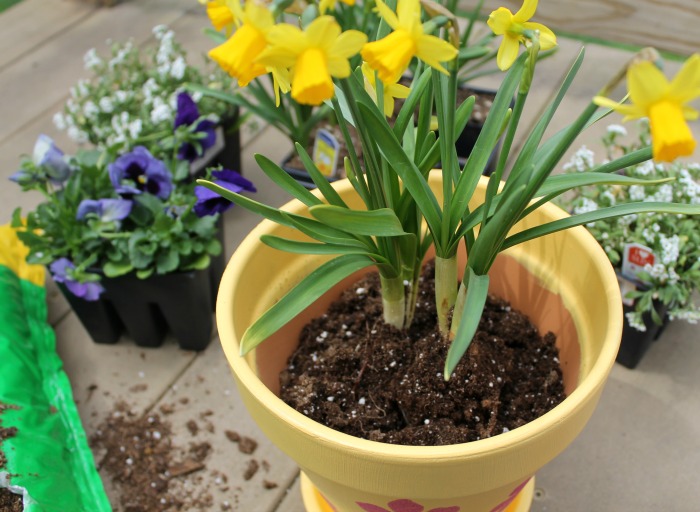
Now you’ll need to select your plants. You’ll want taller flowers for the middle of the pot and shorter flowers for the outer edges, but you need to make sure they’ll coordinate well together too! I chose yellow Daffodils for the middle, then purple Pansies and white Alyssum for the outer area.

To get started, you’ll need to fill your pot about halfway with dirt, depending on the size pot you use. Make sure you use garden gloves though!
You’ll start with the center plants first, removing them from their containers and brushing any loose dirt off. Set them right into the center of the pot, situate them how you like and cover with just a little bit of dirt.
Put the purple Pansies in next, leaving just enough space between each for the white Alyssum.

Fill the remaining large gaps with Alyssum, then using a small shovel (and your garden gloves), place some Miracle-Gro Potting Mix in the small gaps and on top of the plants. Give your planter a good watering and watch it grow into a beautiful and full plant!

You’ll find the Miracle-Gro? Potting Mix Yellow bag, 2 cu. ft. in its new home, in the outside garden center at Walmart. I found mine right by the perennial plants, bushes and trees.
DIY Painted Flower Pot
I love painting my own flower pots. Not only are they fun to make, but they’re cheaper than some of the ones that you can buy in the store, since you start with an inexpensive clay pot! You’ll need the following supplies:
- clay pot and saucer in your choice of size – I used an 8″ terracotta pot for this project
- DecoArt Patio Paint in your choice of colors
- foam brush
- flower stencil – I made my own with a flower punch that I have – here is a similar flower punch
- round sponge brush
- newspaper

How to Paint a Flower Pot
Lay your newspaper out so that you don’t make a mess. I used it to pour my paint on too.
Using the foam brush, paint the entire outside of your pot. I went with 3 coats because I wanted a nice vibrant color. I suggest turning your pot upside down and setting it on something tall, like a cylinder chip container filled with sand. It’ll make it easier to paint and the pot won’t end up sticking to your newspaper. Once it’s dry, turn it over and paint about 2 inches down inside of the pot, so you won’t see any of the original clay color when you fill it with plants. Paint the saucer too.
Grab your flower stencil and position it where you want on the pot. Dip the circle sponge brush in a coordinating paint color and using dabbing motions, stencil in the flower. Repeat all over the pot until you have your desired design. If you’re using a punch and making your own stencil, make sure to use card stock and make a few stencils because the paint will eventually bleed through!

An optional step is sealing your pot with whatever sealer you choose. Your finished pot should look like this and it’s ready to plant in! I hope you enjoyed today’s projects!

You might also enjoy these other fun gardening projects.
What is the first thing that you’d plant in your new pot in your new planter?