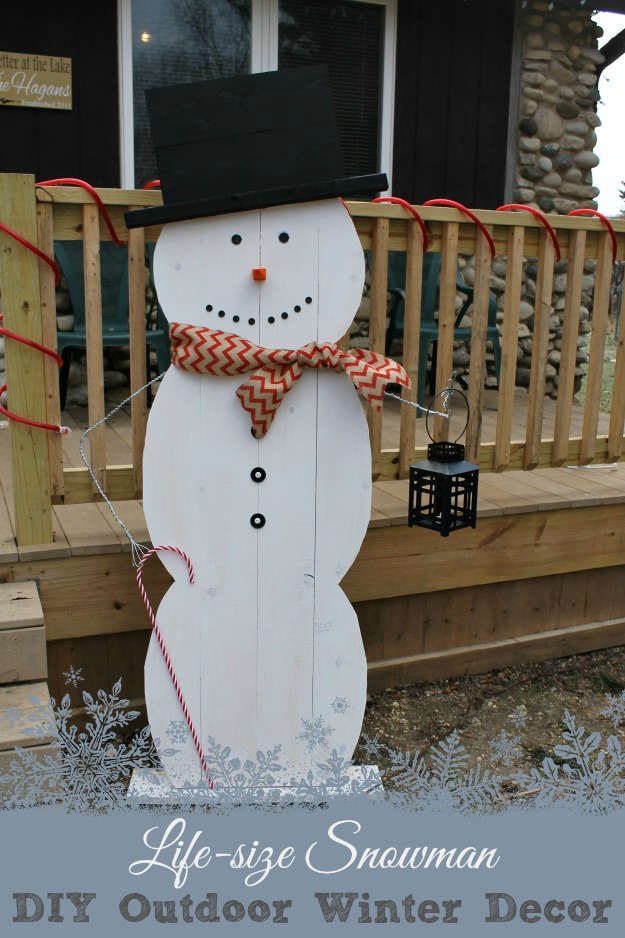
My husband and I like to work on DIY projects. Actually, as we get older it seems that we’re getting more creative and doing projects more often. We’re both just full of great ideas and when our minds connect, the sky is the limit. Like this snowman for instance; I just wanted a small little piece of decor to sit by the front door, something about 2.5 to 3 feet high – short and cute. Hubby was like, “no, it’s got to be huge” and wanted it 6 feet tall. There’s no arguing with his stubborn self, so I improvised when I bought 5 foot boards, thinking he’d make the hat part of the boards. No sir-y, this baby is 6 feet tall, but I’ll let you in on a little secret. I’m glad he won this round because I just adore our snowman!
You can make your own Life-size Snowman DIY Outdoor Winter Decor too and these are the items that you will need:
- Rockwell Blade Runner X2
- 5 – 1×6 boards, 5ft long each
- 2×2 board, 8 ft long
- Burlap for scarf
- medium and large black and white buttons
- lantern
- large candy cane
- wire for hands
- nails
- super glue or strong craft glue
- craft paint – white, black and orange

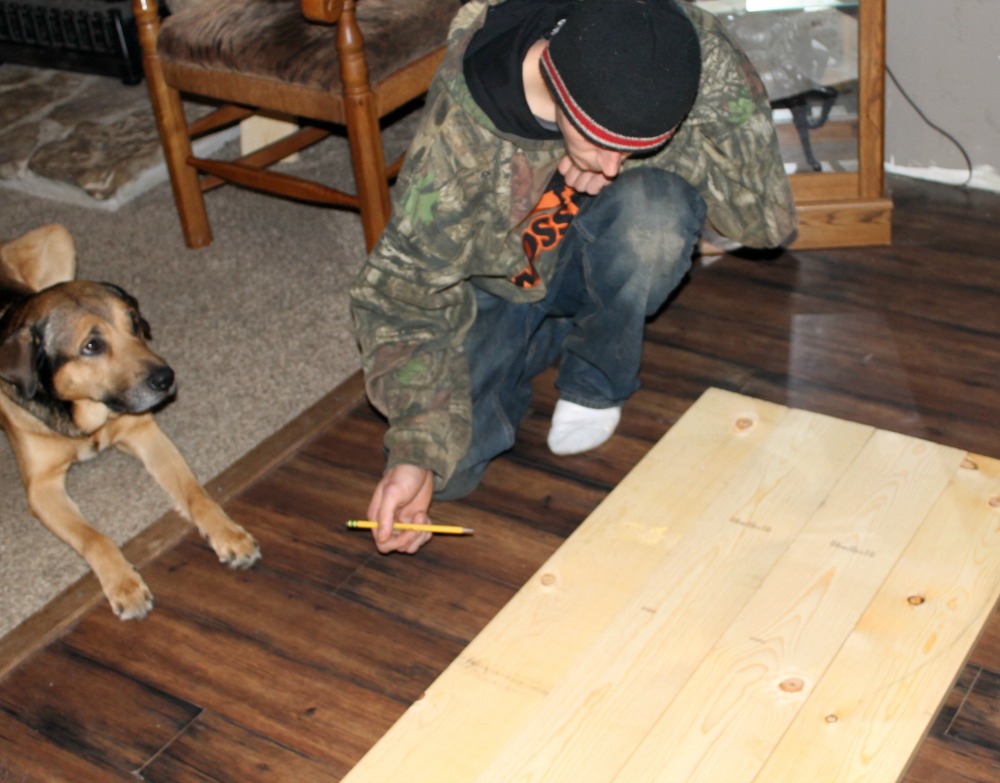
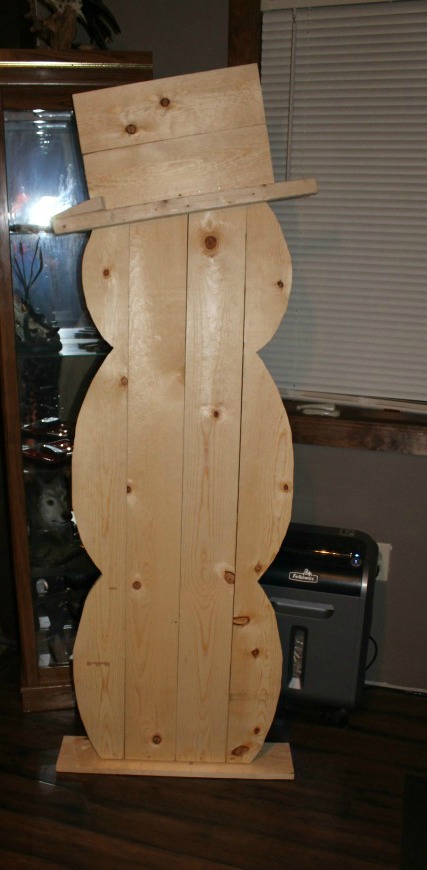
You’ll start by putting 4 of your boards together, lined up perfectly and cutting off any excess wood at either end if necessary. Then you’ll grab a pencil and outline the snowman’s body on one of the outer boards. My brother is more the artist type, so he helped with this part while his pup watched.
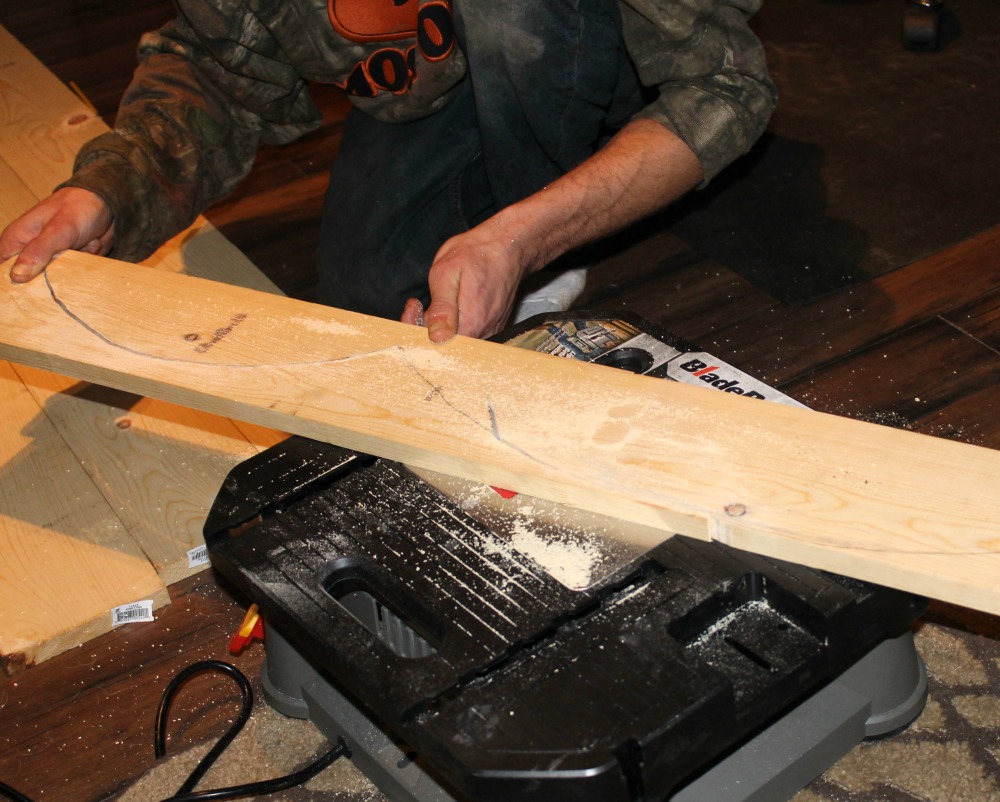
Once you’ve got your marks, you’ll start making your cuts using the Blade Runner X2. After your board is cut, you’ll need to put that piece of wood on top of the opposite outer board and trace it. This way your snowman will look the same on each side. Now cut the other board. You may have small cuts on the top of the other two boards to do, so make those as well.
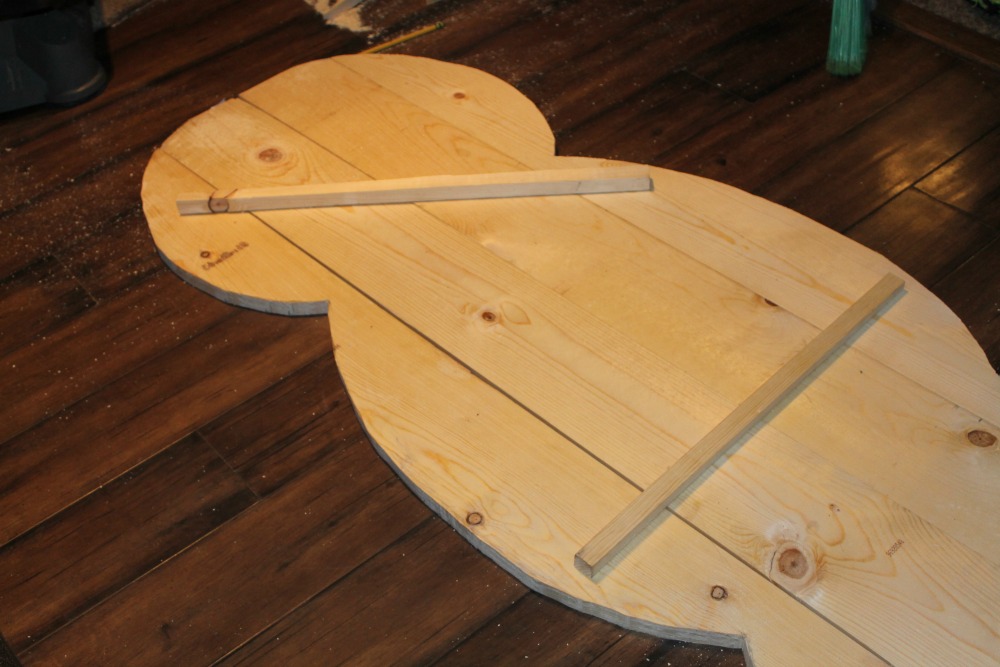
Now it’s time to put your snowman together. Line up all of your boards again so that the bottom is flush and they all match up. Adjust with small cuts if needed.

Now take some of your scraps from the cuts you made to the snowman body and cut 1×1 boards to tack to the back of the snowman. Attach these with small nails. You can also make your carrot now, using a piece of scrap wood just cut it into the shape of a carrot.
Next you’ll need to cut your last 5 foot (1×6) board to make a stand and the hat. You’ll need to use your judgement for what looks right to you because it will depend on how skinny or fat you made the body of the snowman. For the stand, you’ll attach a 2×2 piece of wood to the back of the snowman at the very bottom. Nail it in, then put the stand on and nail the 2×2 into the stand as well. You can also reinforce it with a sturdier brace if desired.
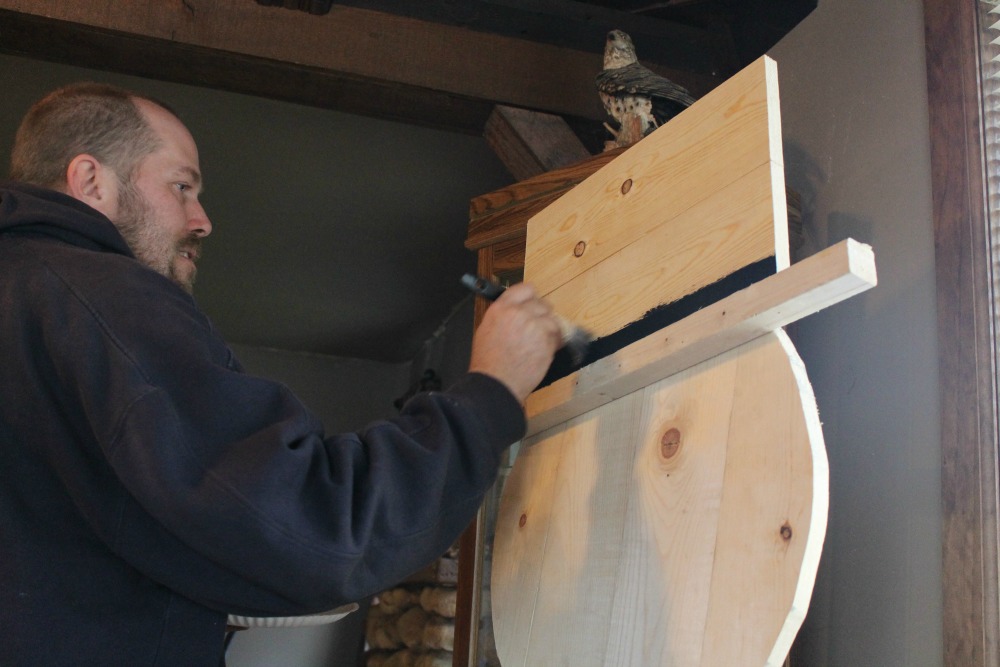
You’ll also need to make your hat with 2 additional cuts from that 1×6 board. You’ll want each cut to be about 15 inches long, but again use your judgement depending on how skinny or fat your snowman is. Attach it all with a 1×1 brace, using nails to hold it in place. Cut a larger piece out of the 2×2 and nail that to the hat. Using 2 more braces, attach the hat to the snowman’s head from behind, using nails to secure it.
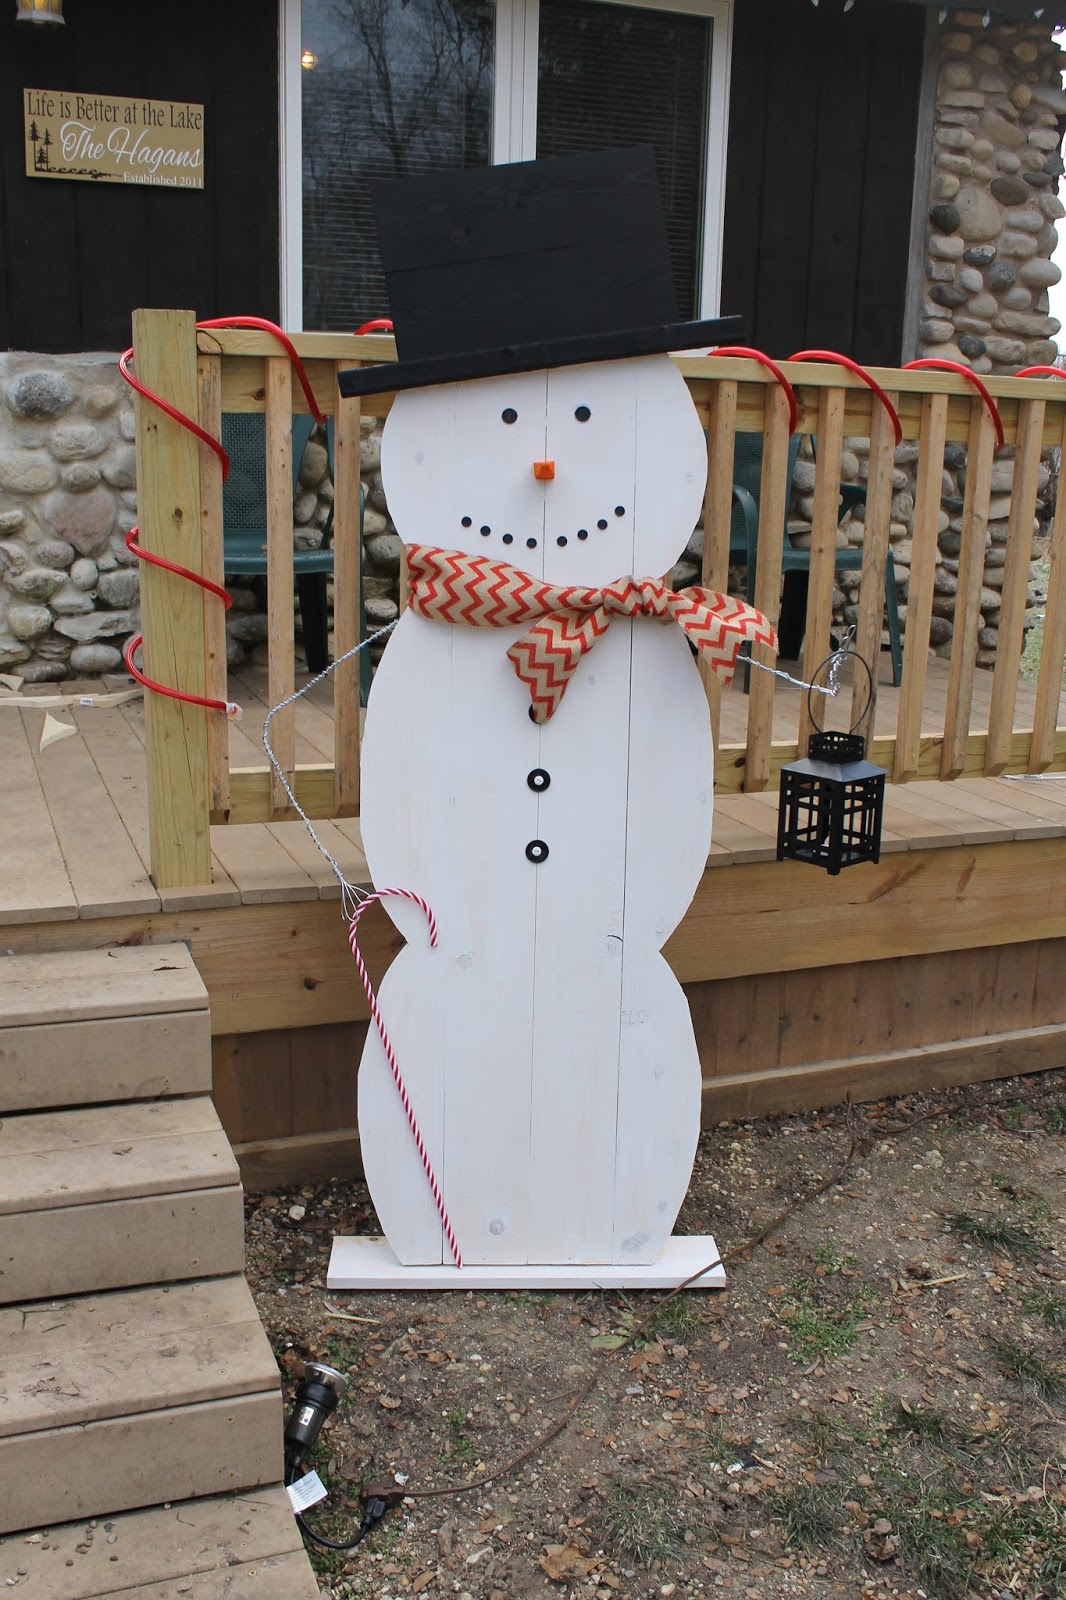
Make sure your snowman is sturdy all around and add additional braces to the back if needed. Pour some black paint on a paper plate and paint your hat, then let dry.Using the white paint, paint the entire body of the snowman, including the stand. Paint the carrot orange and nail into the middle of the snowman’s head.
Once all of the paint is dry, you can start decorating your snowman. Put the buttons in place however you’d like for the eyes and mouth, then attach with super glue or heavy duty craft glue. Align the button down the snowman’s stomach and repeat the previous step with glue. We even added smaller white buttons on top of the black buttons to make them “pop” a little more.
Make your hands out of wire by going up and down with the wire about 3 times (so you’ll have what look like 3 strands) and form 3 fingers onto each end. Now drill a small hole into each side of the snowman, a couple of inches under its neck. Slide the wire in and secure with glue. You could use sticks instead if you prefer.
Now grab your burlap and tie it around the snowman’s neck, cutting a “v” in the fabric at each end. Set the candy cane in place and adhere it with glue. Add a small lantern to the other hand.
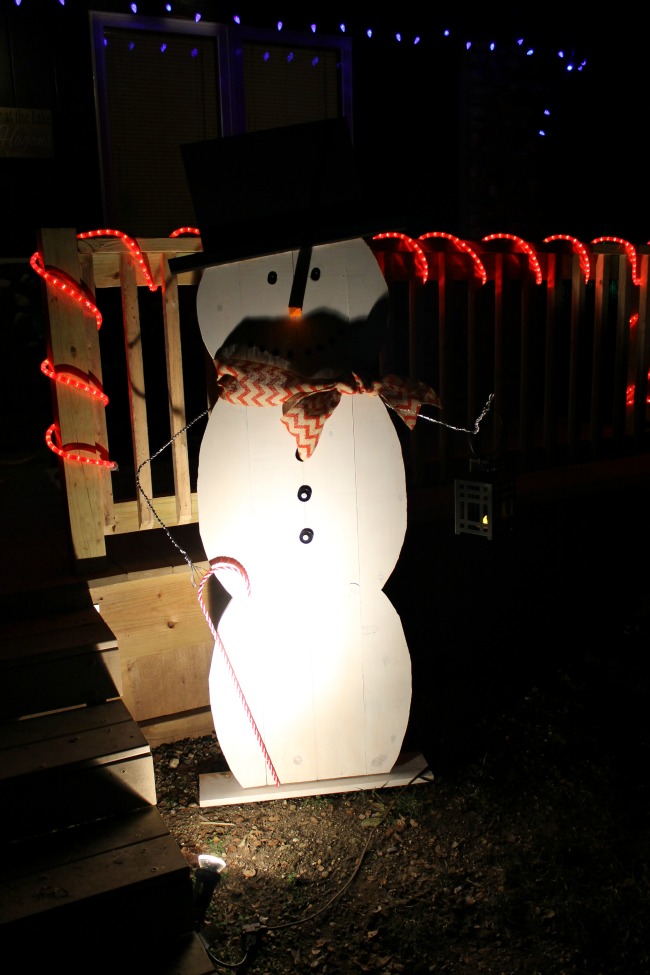
We granned a small yard light to shine on our snowman at night, but that’s totally optional!
I hope that you enjoyed our project!
