Why do men worry about silly things such as a pink car seat? I am passing my daughter’s convertible car set down to my son. Well to please my husband I covered my daughter’s convertible car seat. First I checked online to see how much it would cost if I were to purchase one . . . only $50, and I did find some on sale for $30. Next I checked my fabric stash, and with two girls I could only find a couple of masculine pieces of fabric. I do mean pieces I sewed two pieces together to get my width. I searched online for a free pattern and came up empty. So naturally I decided to make it up as I went. I gathered up all the elastic I could find. My design has several different sizes of elastic and up cycled pieces.

Materials:
- Fabric approximately 30 x 36 in
- Scissors
- Seem ripper
- Thread
- Elastic 1/ 2 in
- Fray Check
- Measuring Tape/Ruler
Step One:
First I cut my fabric 30 x 36 and mimicked the curve of the top of the car seat for my top. If you have a similar car seat like mine I mimicked the curve of the bottom of the car seat as well so that I could easily use my release handle to recline the seat.
Step Two:
I had several pieces of elastic for my design, but yours I would recommend finding your center point and starting at the top. Make sure to pin it! If you have never sewn with elastic you have to tighten your elastic by pulling it then pin it in place. You will do this around your entire boarder. Just make sure you leave enough fabric to go back and cover your elastic.
Tip: I didn’t cut any of my points/corners/curves I just stretched the elastic and doubled pinned to keep it in place as I sewed.

Step Three:
You will need to sew your elastic onto your fabric. I sewed mine in the center left of my elastic, and then I came back over with the fabric and sewed center right to make sure the elastic was secure.

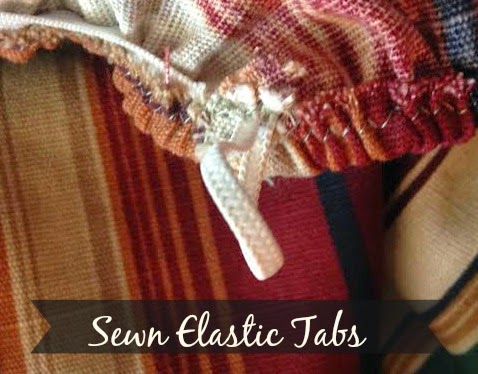
Step Four:
I created elastic tabs anywhere they were on the original car seat cover. This will help the car seat cover stay in place.

Step Five:
This is the hardest part of the entire design, and if you purchase a car seat cover in the store they usually eliminate this step. I created button holes for all five points of the safety harness. I even created extra ones for the shoulder straps and the buckle for growth spurts.
Tip: If you have never sewn button holes they are not too terribly hard if you follow your instructions according to directions for your sewing machine.

*Please note, aftermarket products may void the warranty on your car seat. Check with the manufacturer.