Yes, it is October, but I believe in getting a head start on my Christmas gift making. I love Christmas time. One of my family traditions is making hand-made gifts. Now that my eldest daughter is eight she has been able to help me make jewelry for the girls/ladies in our family. I would have to say that eight is the perfect age for making jewelry. We have tried in the past, but she just wasn?t quite there. I have different guidelines for children/beginners and adults/experienced. If you have never created jewelry make sure you stick with the guidelines for children. Not only will it save you money, but time as well.
When starting a new project the most important thing is being able to locate all your materials. If you are a beginner you will be very pleased with my material selection. The only guideline I have are for you is to cut extra cord (more than you need) so that you are able to tie the cord correctly. They way I tie this cord is to get both ends equal and tie your knot with both your ends together. Don?t worry if they do not meet flush with your beads, you can grab both ends and pull it to your desired position. Sorry it has been a long time since I was a girl scout and couldn?t find the correct name for this knot.
Materials for children/beginners:
~Inexpensive beads
~Clear stretch cord .8mm
If you have experience making jewelry, but still are trying to figure out the most inexpensive way to make your jewelry I would suggest a jewelry tool kit which consists of bent nose pliers, flat nose pliers, long nose pliers, round nose pliers, side cutter, and a micrometer. Don?t worry I have listed them again at the bottom for your shopping list. Unfortunately I do not remember where I purchased all my materials, but I gave you as many pictures and links as I could find to help you on your jewelry making journey.

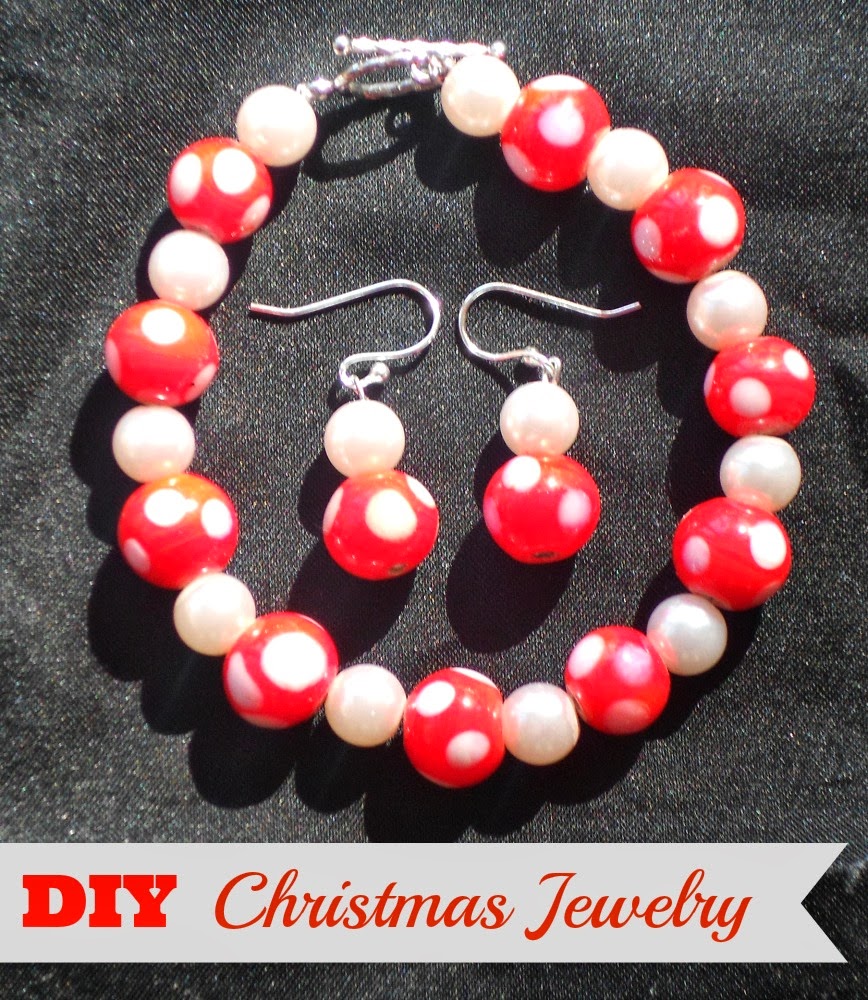
First, I began with the bracelet. I measured the wire longer than I needed (***remember you have to tie the wire***). The less stress the better you don?t want to have a lot of wasted materials due to poor measuring, or just total frustration because you cannot tie the wire. For this bracelet I used a side cutter, round nose pliers, and bent nose pliers. Once you have the correct measurement use your side cutter to snip the wire. Then secure one end of your toggle claps with a knot to keep from losing all your beads. Decide which beads you are using and begin. Once you have finished stringing your beads secure the other end with the appropriate toggle clasp with a knot and you are finished.
Next get your earring findings and your flat end head pins. I chose to make small dangle earrings and only used two beads. I placed my two beads on the flat end head pin, and used the round nose pliers to wrap the end of the pin. Make sure you are bending near the top bead leaving enough room to secure the loop around the appropriate place on your earring finding. In order to finish your loop this way you will have to use your side cutter to cut the wire (***remember leave just enough to loop***) to secure the loop. Now your earrings are secure.

Materials for adults/experienced:
~More expensive beads (depending on your budget)
~Cousin Jewelry Basics Metal Findings 145-Pkg-Silver Starter Pack COUSIN-Jewelry Basics Collection
~Wire
~Tools (side cutter, round nose pliers, and bent nose pliers)
~super glue

Jewelry Making Tools:
~Bead Landing? Jewelry Tool
? Bent Nose Pliers
? Flat Nose Pliers
? Long Nose Pliers
? Round Nose Pliers
? Side Cutter
? Micrometer
