
Halloween is such a fun time of year. I just love the spooky decorations and all around festivities that surround this entertaining holiday. This year, we went all out with pumpkins and gourds adorning the front steps leading up to the house and while that’s a really cute look for fall, I decided to make some spider web mason jars to throw into the mix, to spruce the decor?up for the Halloween theme. I partnered with Sharpie to make these spider web mason jars, but all opinions are my own.
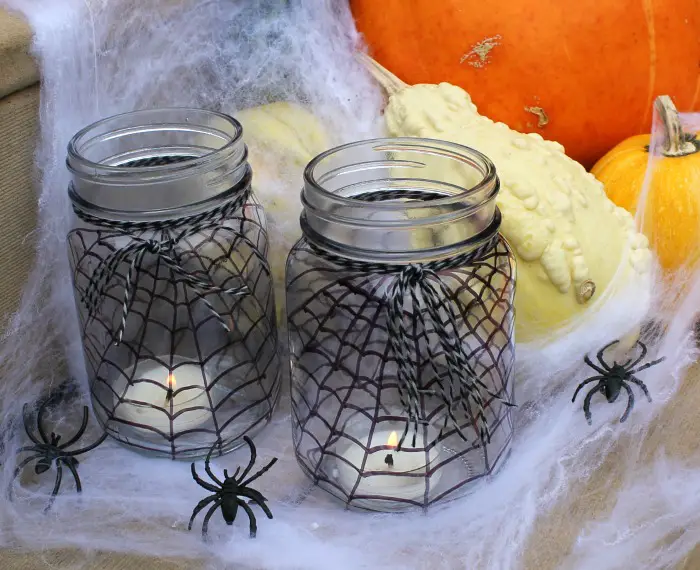
I just love how these spider web mason jars?turned out and I’m going to make more this weekend, to line the entire steps for trick or treat. I’m sharing?the spider web mason jar tutorial with you too because they are super simple to make and would be?a great last minute addition to your Halloween decor. If you’re hosting a party, these spider web mason jars are a great activity for the kids to make too!
Spider?Web Mason Jars tutorial
You’ll need the following supplies:
- Mason jars – pick the size you want
- Sharpie Extreme permanent markers (black)
- Black and white baker’s twine
- Tealight candles (optional)

Sharpie Extreme permanent markers are best for this project because you want them to be able to stand up to the outdoor elements.?Sharpie Extreme are ideal to use for outdoor crafts because they resist fading when exposed to rain, snow, mud and sunlight. They can be used on many surfaces including plastic, glass and wood.

Step 1. Using the black?Sharpie Extreme permanent marker, draw a line right down the middle of the mason jar. Starting at the top line, draw a line down the right side of that line to the bottom of the mason jar, this time fanning out a bit as you go, like in the image above. repeat this process to the left of the first line. Repeat these steps, alternating sides, until the lines meet in the back.
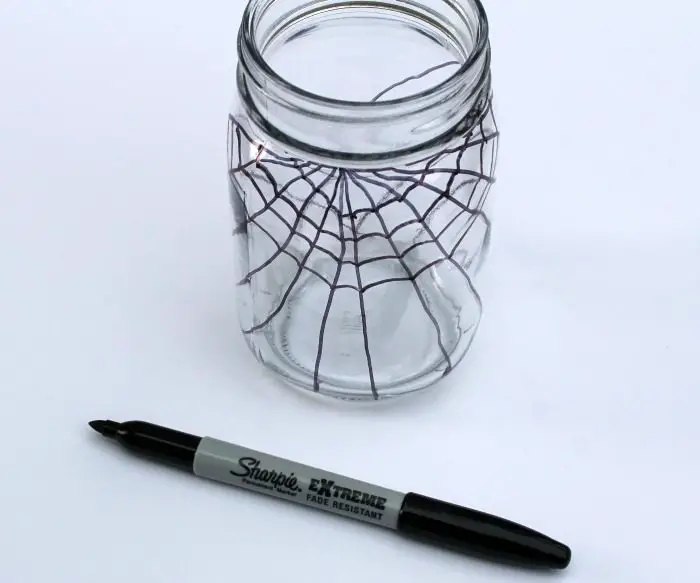
Step 2. Now it’s time to work on the webbing. Starting from the middle and working to the right, draw slight web-like arches between each line. Repeat on the left side. Repeat this process all the way down, until you get to the bottom of the mason jar with each line.

See how easy that was?The great thing is that you can mess up a little with your lines, but it doesn’t much matter in the end because the web look allows room for errors.

Step 3. Now you’ll need to finish your spider web mason jar off with bakers twine. Cut one piece e about 2 feet long and 4 pieces about 6 inches long. Find the middle of the 2′ twine and situate it in the middle of the mason jar, where each line of the web meets at the top. Gather the (4) 6″ pieces of twine and put them behind the longer twine, right in the center where each line of the web meets. Wrap the 2′ piece of twine?around the back, then the front, repeating until you end in the front again. Tie it off, then gather the 6″ ends and tie them in a knot.
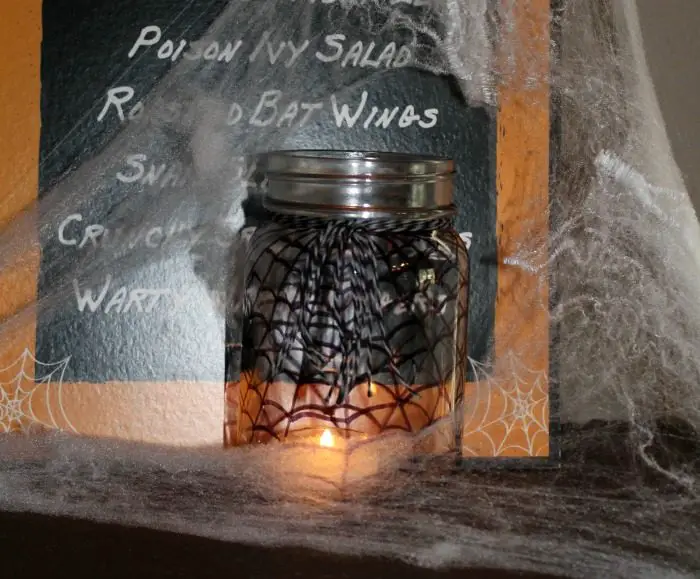
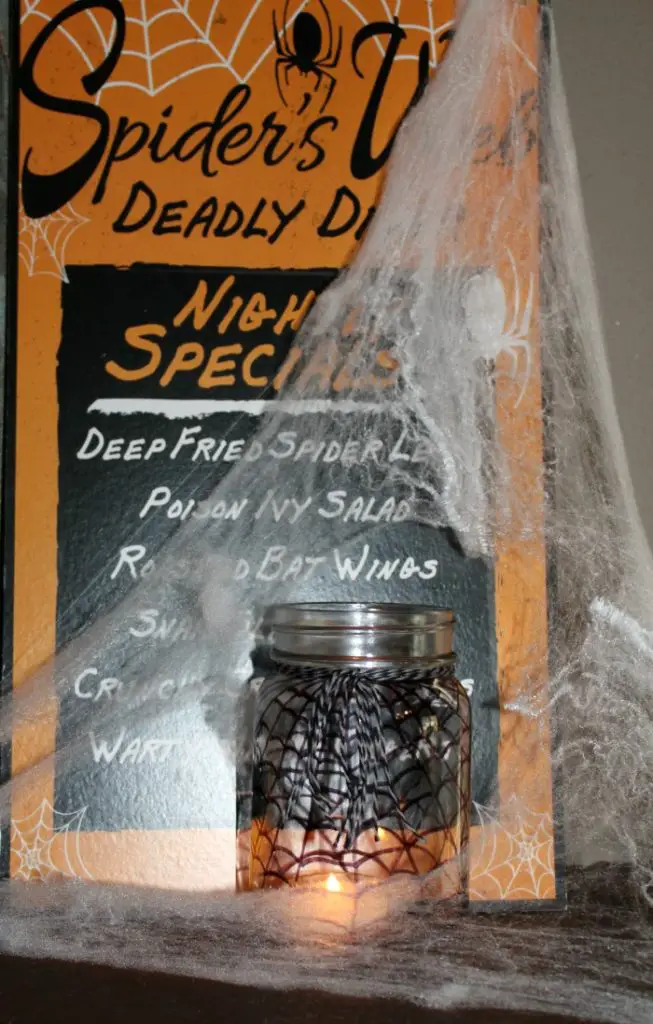
Now you can add a tealight candle if you wish! Set your spider web mason jar on some fake cobwebs if you’d like. As you can see, it looks great inside the house too so you can really put these wherever you would like to add to your existing Halloween decor. I added one to our fireplace mantel, in front of a Halloween sign.
How would you decorate with these spider web mason jars?