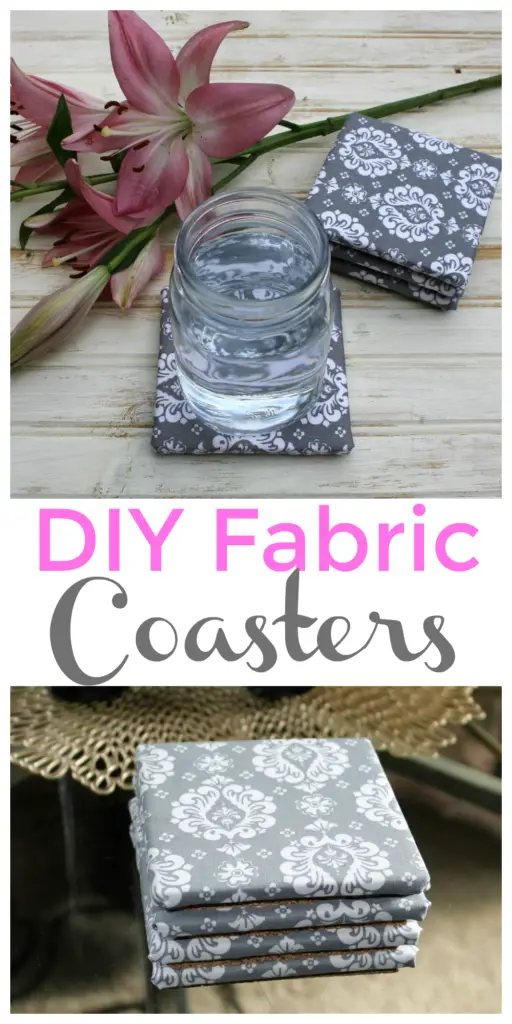
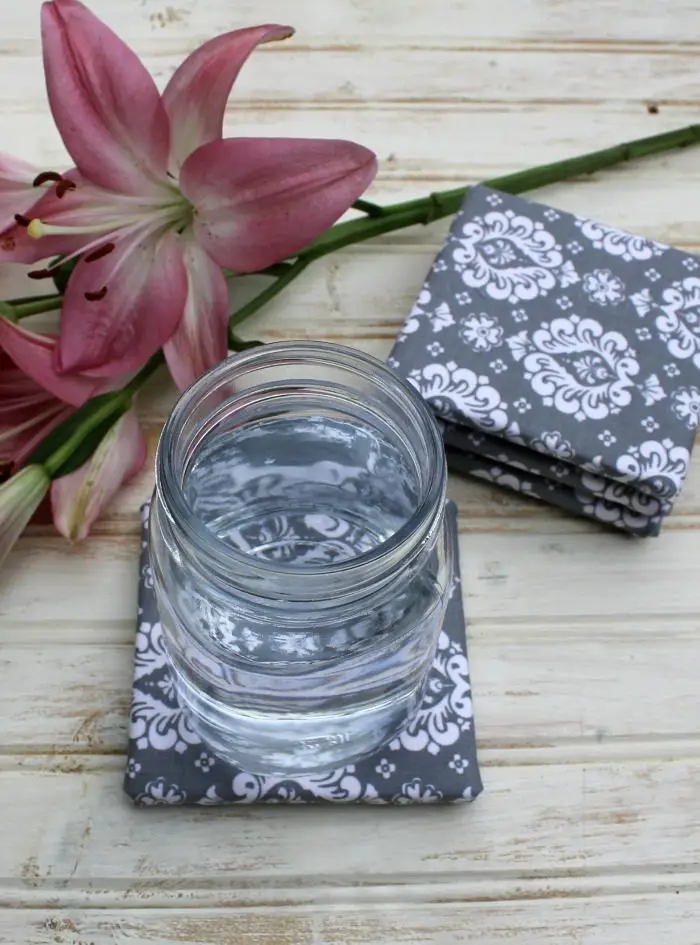
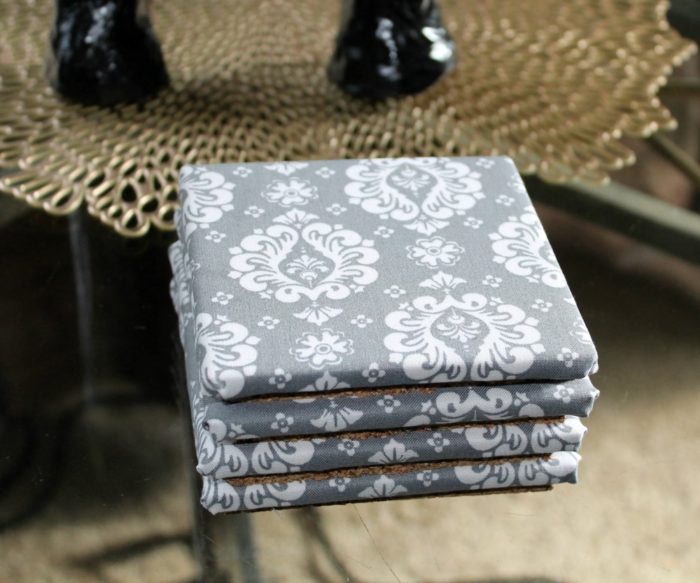
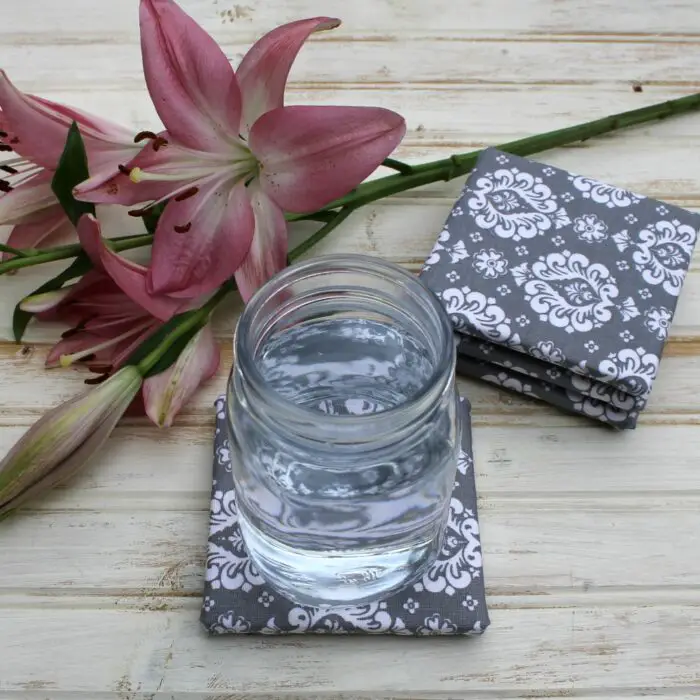
Our Simple DIY Fabric Coasters are easy to make, budget friendly, go together quickly and make terrific gift ideas for the holidays!
HOW TO MAKE SIMPLE DIY FABRIC COASTERS
I love creating things and today I’m sharing one of my latest projects – DIY Fabric Coasters. You won’t believe how simple they are to make and better yet, you can make these DIY fabric coasters to fit every décor. These make perfect handmade gifts for the holidays and I already have a few people in mind to gift a set to!
Before you get started on this easy DIY tutorial, here are a few tips:
DO I HAVE TO USE A FABRIC CUTTER AND BOARD OR CAN I USE SCISSORS?
You can definitely use a fabric marker and mark out your shape and use regular scissors. It’s totally up to you.
Are you looking for other fun and easy craft and DIY tutorials? We definitely have a few that I think you will be interested in, especially these Cricut ceramic coasters!
How to care for fabric coasters
Caring for the coasters is easy. I use a Scotch Brite Lint Roller, which is perfect for cleaning off any dust or debris that may stick to the fabric.
WHAT IS BATTING USED FOR IN SEWING?
Batting helps provide extra cushioning between the titles or fabric. It also helps give height to your coaster or sewing project.
Do you have cheerleader in your life? If so, then you’ll definitely need to make this door hanger! Want to make a few hair scrunchies? Our easy DIY tutorial is simple and quick to make! Looking for a gift idea for a new baby? Our DIY Diaper Bag may just be what you are looking for!
HOW TO MAKE FABRIC COASTERS
Making these DIY coasters doesn’t take a lot of supplies. With just fabric, ceramic tiles, cork board, and glue, you will be on your way to making these handy gifts!
The complete tutorial and instructions list is available through the printable card below. Here are a few photos though that show the process step by step as you can refer to them as needed.
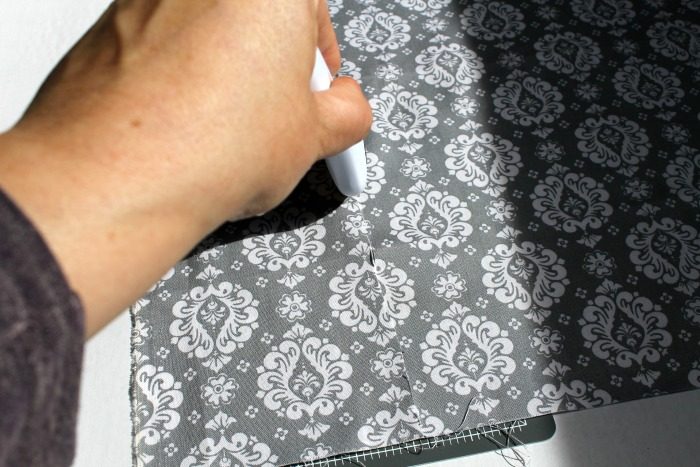
Step 1 – Cut your fabric
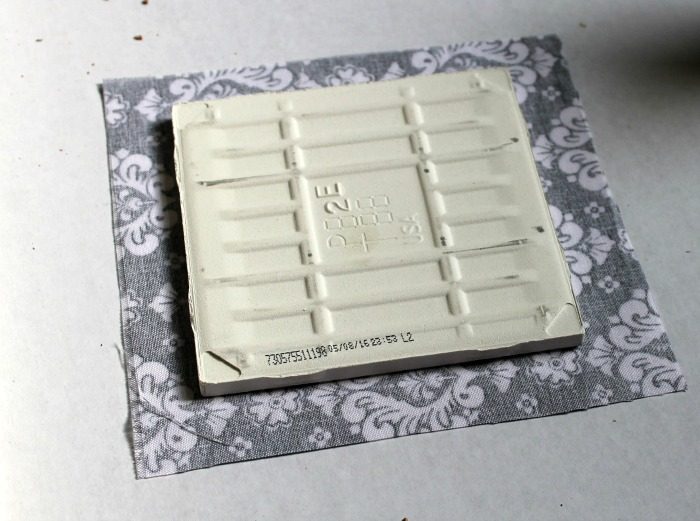
Step 2. Put the material right side down and lay the title on it.
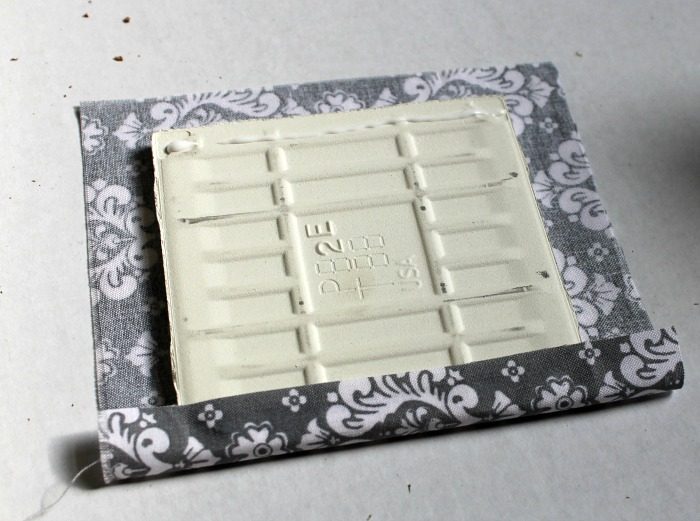
Step 3. Apply adhesive.
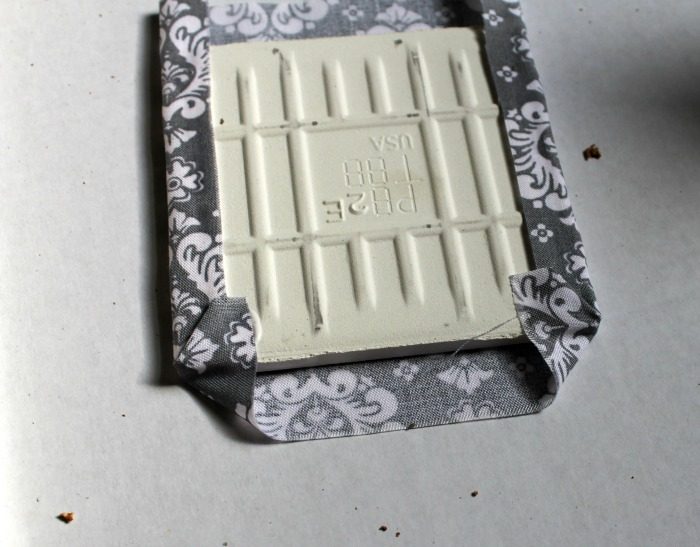
Step 4. Wrap
More adhesive
Step 5. Trim
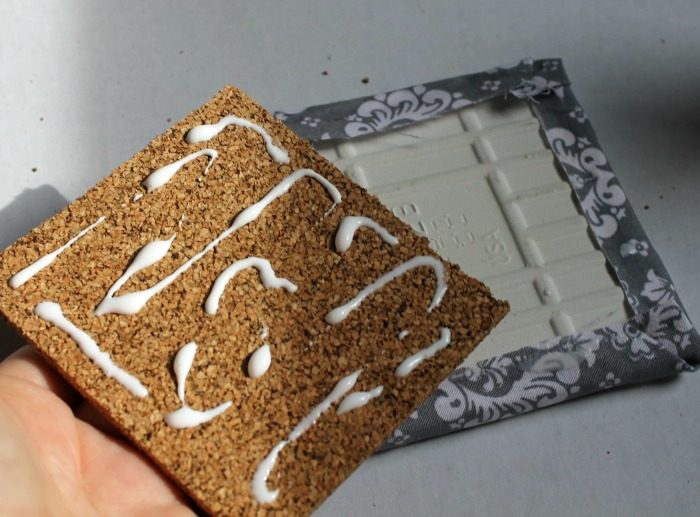
Step 6. Glue cork board if you are using coasters that don’t already have a cork backing
How to Make Simple DIY Fabric Coasters

Our Simple DIY Fabric Coasters are easy to make, budget friendly, go together quickly and make terrific gift ideas for the holidays!
Materials
- Fabric quarters
- Ceramic tiles – 4×4 inches
- Cork board
- All purpose glue
- (optional) Bonded Polyester Quilt Batting
Tools
- Scissors
- Fabric Cutter and Board
Instructions
- Trim your fabric to 6×6 inches.
- Lay fabric upside down, set tile upside down on top of it, right in the middle. There will be 1 inch of fabric overhang all around the tile.
- ****If you’d like a softer coaster, and a layer to absorb wetness, add a 4×4 inch piece of Bonded Polyester Quilt Batting between the tile and the fabric.
- Apply glue to one edge of tile. Flap fabric over and rub gently with your fingers to adhere. Repeat on the opposite side of tile.
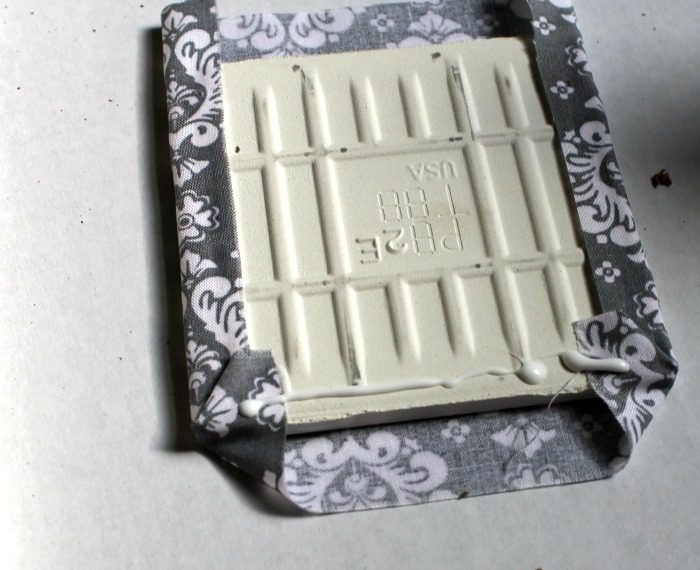
- Wrap the sides. This is a two step process for a neat finish.
- Make a corner like you’re wrapping a present, then glue the edge down as shown in the photo below. Gently hold down with your finger to adhere.
- Apply glue to entire edge of tile, including on top of the fabric corners you just did. Flap fabric over and rub gently with your fingers to adhere. Repeat these two steps on the opposite side of tile.
- Trim your cork board to just under 4×4 inches.
- Apply a generous amount of glue to one side of cork board, covering all of the edges and middle well. Apply to the bottom of the tile, covering each fabric edge.
- That’s it! Pretty easy, right?!
- Now you’ve got a beautiful set of fabric coasters to use in your home or gift to a friend.